 When it comes to makeup, what’s your favorite step?
Is it the foundation?…Getting your coverage just right.
Or how about eye shadow?…The artful blending of shades to create a look that pops!
Is blush your fave?…Adding just the right flush to your cheeks.
Or how about lips?…Perfecting a kissable pout!
When we think of makeup, the aforementioned elements are the ones that generally come to mind for many women. Rarely is strategic thought given to the art of facial contouring. As a professional makeup artist, I have to tell you, contouring is everything to me! It’s the first decision I make when I approach a client’s face to apply makeup. Where some artists think about colors, I tend to ponder shape….and I select my color palette according to the contour, contrast, and highlight I want to create. Quite frankly, when the contour is RIGHT, the inclusion of color is merely an accent, and not the focus. I have seen so many beginner artists struggle over which colors to go with for a makeup application…asking the client questions like: What color is your dress? Are there colors that you love/hate? What’s your favorite color?
Oh girl NO! STOP! Color is very important, don’t get me wrong. But as a makeup artist, you want to offer your client something extraordinary…and with the proper application of contouring, you can transform your client’s look from something that she can whip up on her own in-between stop lights…to something spectacular. A look that she will remember always…a look that she will return to you to execute.
If you’re reading this post and you’re not a makeup artist, don’t fret. Use these tips as part of your personal makeup application. I guarantee that it will make a world of difference in your end result.
While I have rather pronounced cheekbones, my face is still rather round. And God forbid if I need to drop a few lbs…well lets just say the face gets even rounder. Having said that, I always apply my makeup with contouring in mind.
Case in point…last week I attended a press event featuring Kim Kardashian (more on the event soon). There’s no way in hell I was going to be seen in pics next to that Armenian Sexy Kitten without my face beat to the heavens!
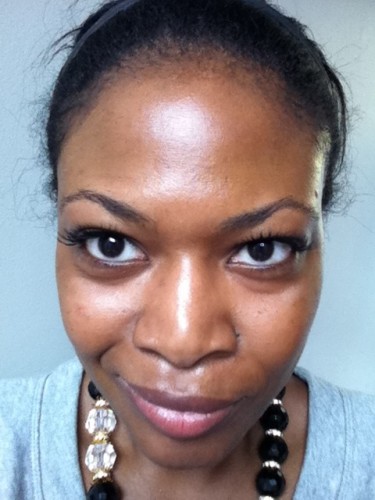
Here are a couple of before pics…I am not wearing any makeup….and I mean that in the truest way. Not in the “Jessica Simpson marie claire cover kind of way. As you can see, I have a pretty round face.![photo[1]](http://www.thisthatbeauty.com/wp-content/uploads/2010/11/photo1-e1288983870677-375x500.jpg)
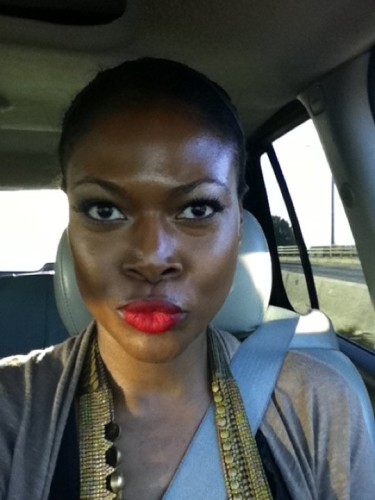
And through the magic of contouring, here is my face afterwards
Holy bone structure, Batman!
With the help/magic of contouring, I gave my face more definition and structure. Notice how there’s lots of contrast. Notice how my features pop. My brow is suddenly stronger and my heavy upper lid is decreased. My nose is sharper. My cheek bones pop. My double chin is recessed. My eyes appear more alive.
Question for you: Other than my red lip, what “colors†do you see?
Answer: None
Another question for you: Despite my neutral color palette, is my look “boringâ€.
Answer: You better say “noâ€. LOL
But seriously, the answer to that last question is “no†because through the use of contouring, I created points of interest without the over use of color to razzle and dazzle the eye.
Makeup Artists and lovers of makeup: By stepping up your contouring ability, you will make you job SOOO much easier. You won’t find yourself struggling over “color†choices. Because, quite honestly, once you beat a face to look beautifully, naturally, contoured and chiseled, you don’t need much color…it’s merely an accent at that point.
To prove that there’s hardly any color in this look, here a rundown of the products I used:
I always start with:
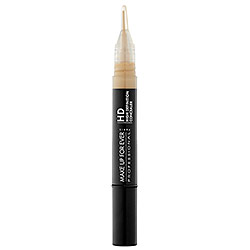 MAKE UP FOR EVER HD Invisible Cover Concealer (my shade is 360) under and around the eyes, down center of nose, center forehead, and center chin
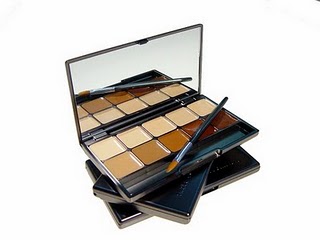 Next I cut into the hollows of my cheeks with one of the darker shades in the Three Custom Color Specialists Professional Concealer Palette. I also take the darker shade and blend it around my hairline, facial perimeter and sides of nose. This palette is a contouring dream because every shade is at your fingertips.
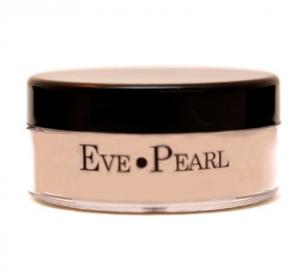 For my eyes I worked Eve Pearl Loose Powered (tan/dark) into my crease. This powder in pretty much colorless but works beautifully to mattify and naturally intensify the crease when worked back and forth. I also used this powder to set my face.
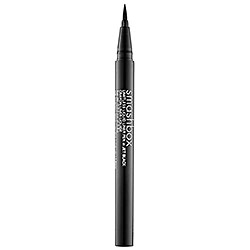 My most favorite liquid eye liner is Smashbox Limitless Liquid Liner Pen. MANY brands make this type of felt tip liner pin, HOWEVER Smashbox is my favorite. It is the blackest black ever and the application is super exact and rich. There is no need to build the color because with the lightest tap, the color depth is there. When it’s time for you to re-up on your old steady black liner, try this!
I used the pen to line my upper lash line.
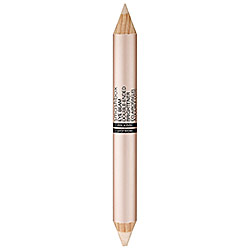 Another hero of mine from Smashbox is this – Eye Beam Double-Ended Brightener. Come To. Momma! This brightener is all kinds of amazing.com! In the pic above I used it to pop my brow bone, down the center of my nose to MJ it a bit (lol…I kid), and I also used the brightener on my inner eye/ tear duct. This is a truly powerful contouring tool. Get involved!
I also applied individual lashes, as a contouring effect. I applied medium length in the middle and long individuals on the end to give my eyes more length and balance.
I brushed and filled in my brows with a random KISS brow pencil. It’s random, but perfect!
The lip is NARS Dragon Girl
And that’s it my dears. Not a heck f a lot of products, right? And really, no color other than the lip…..Just the proper application if highlighting and shading. It makes all the difference in the world.
Go forth and contour!
xoFelicia

What double chins?? your skin looked radiant before the makeup. but I do see what you meant by the contouring. Your lashes are very thick and long in the before picture, were you wearing anything on them then?
Hi Debbie! Yes I truly have a double chin. Perhaps the before pic didnt capture it that well but it’s there! As for my lashes, I was bare faced for that shot. Perhaps the camera angle is making my lashes look a bit longer. My natural lashes are somewhat long to begin with. but lashes in the after pic really helped to open my puffy upper lid.
You look gorgeous and did a stunning job (as usual)! Btw, you don’t have a double chin!
Redseouls. I do I do have a double chin! Thank you for your comment. I’m glad you liked the post!