Valentine’s Day is one of my absolute favorite nail art holidays! Not only do I love all shades of pink, but these colors and designs can be worn any time of the year. My Valentine’s Day gift to you is 3 easy-peasy nail art looks for you to create your own holiday mani! Make sure you tag @theGLITTERYblog and #TTBMani on Instagram so I can see your LOVE-ly looks. Now let’s get started with this Valentine’s Day Nail Art.
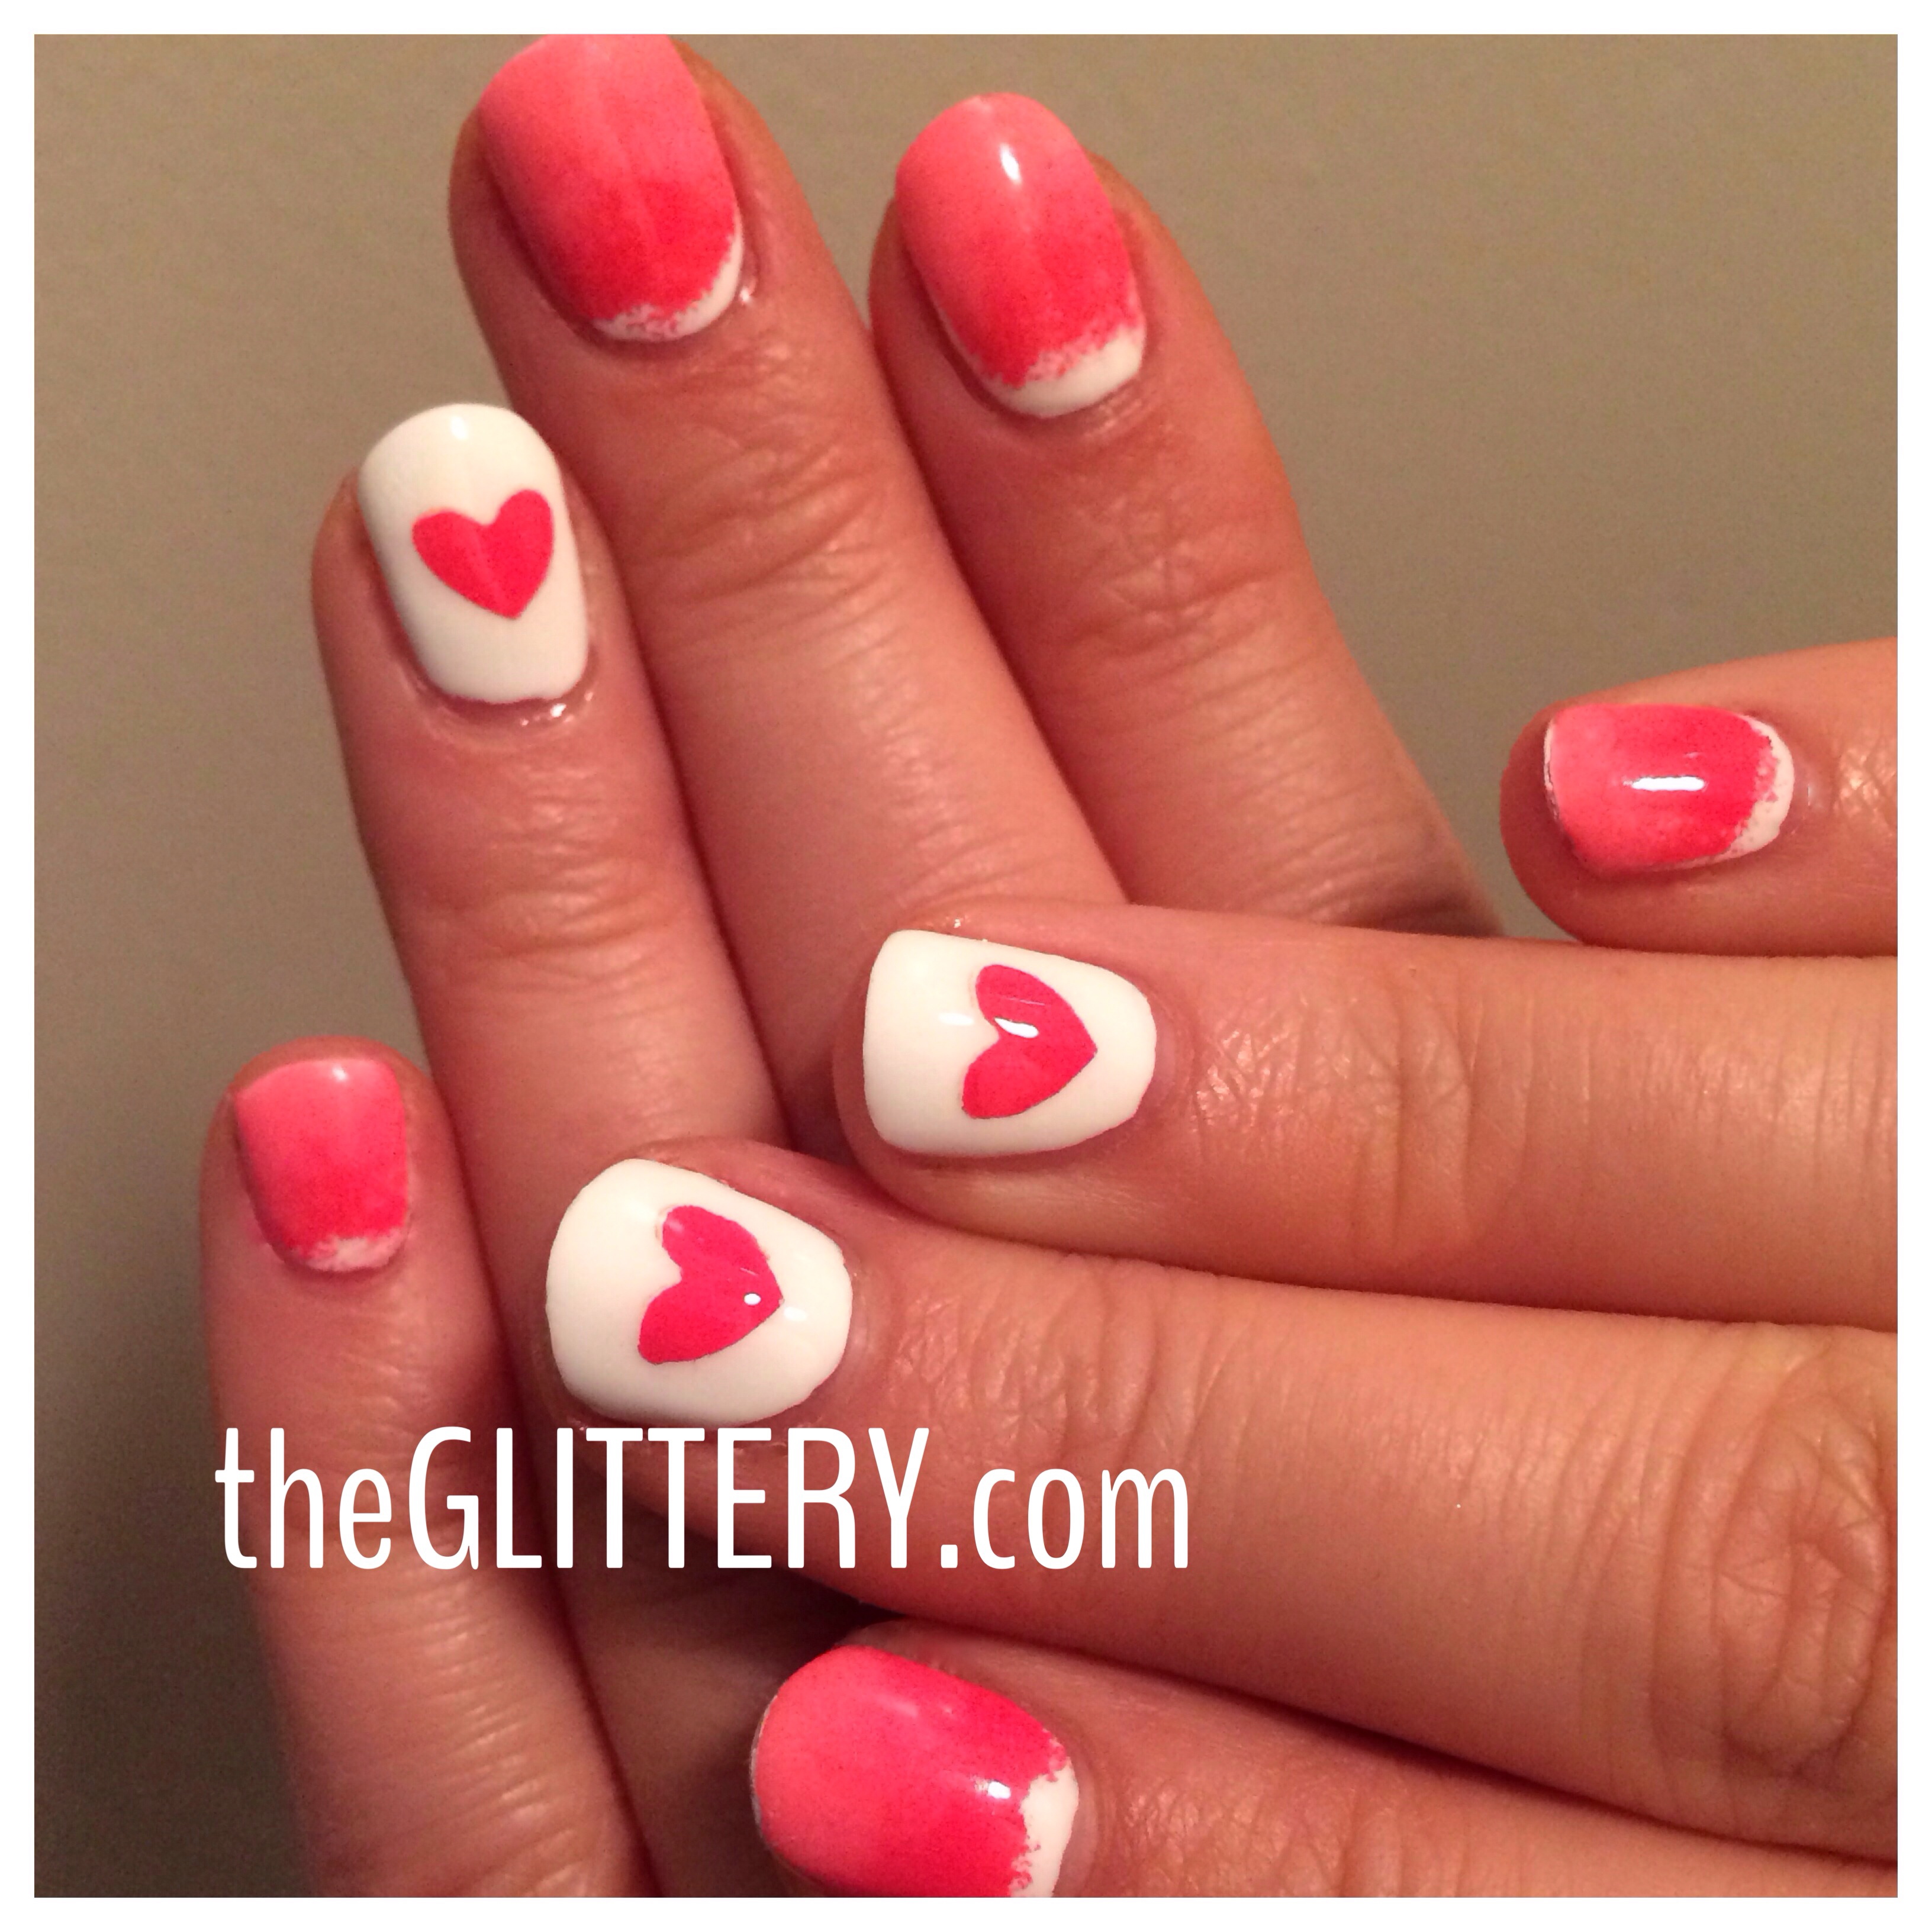
Ombre
Supplies:
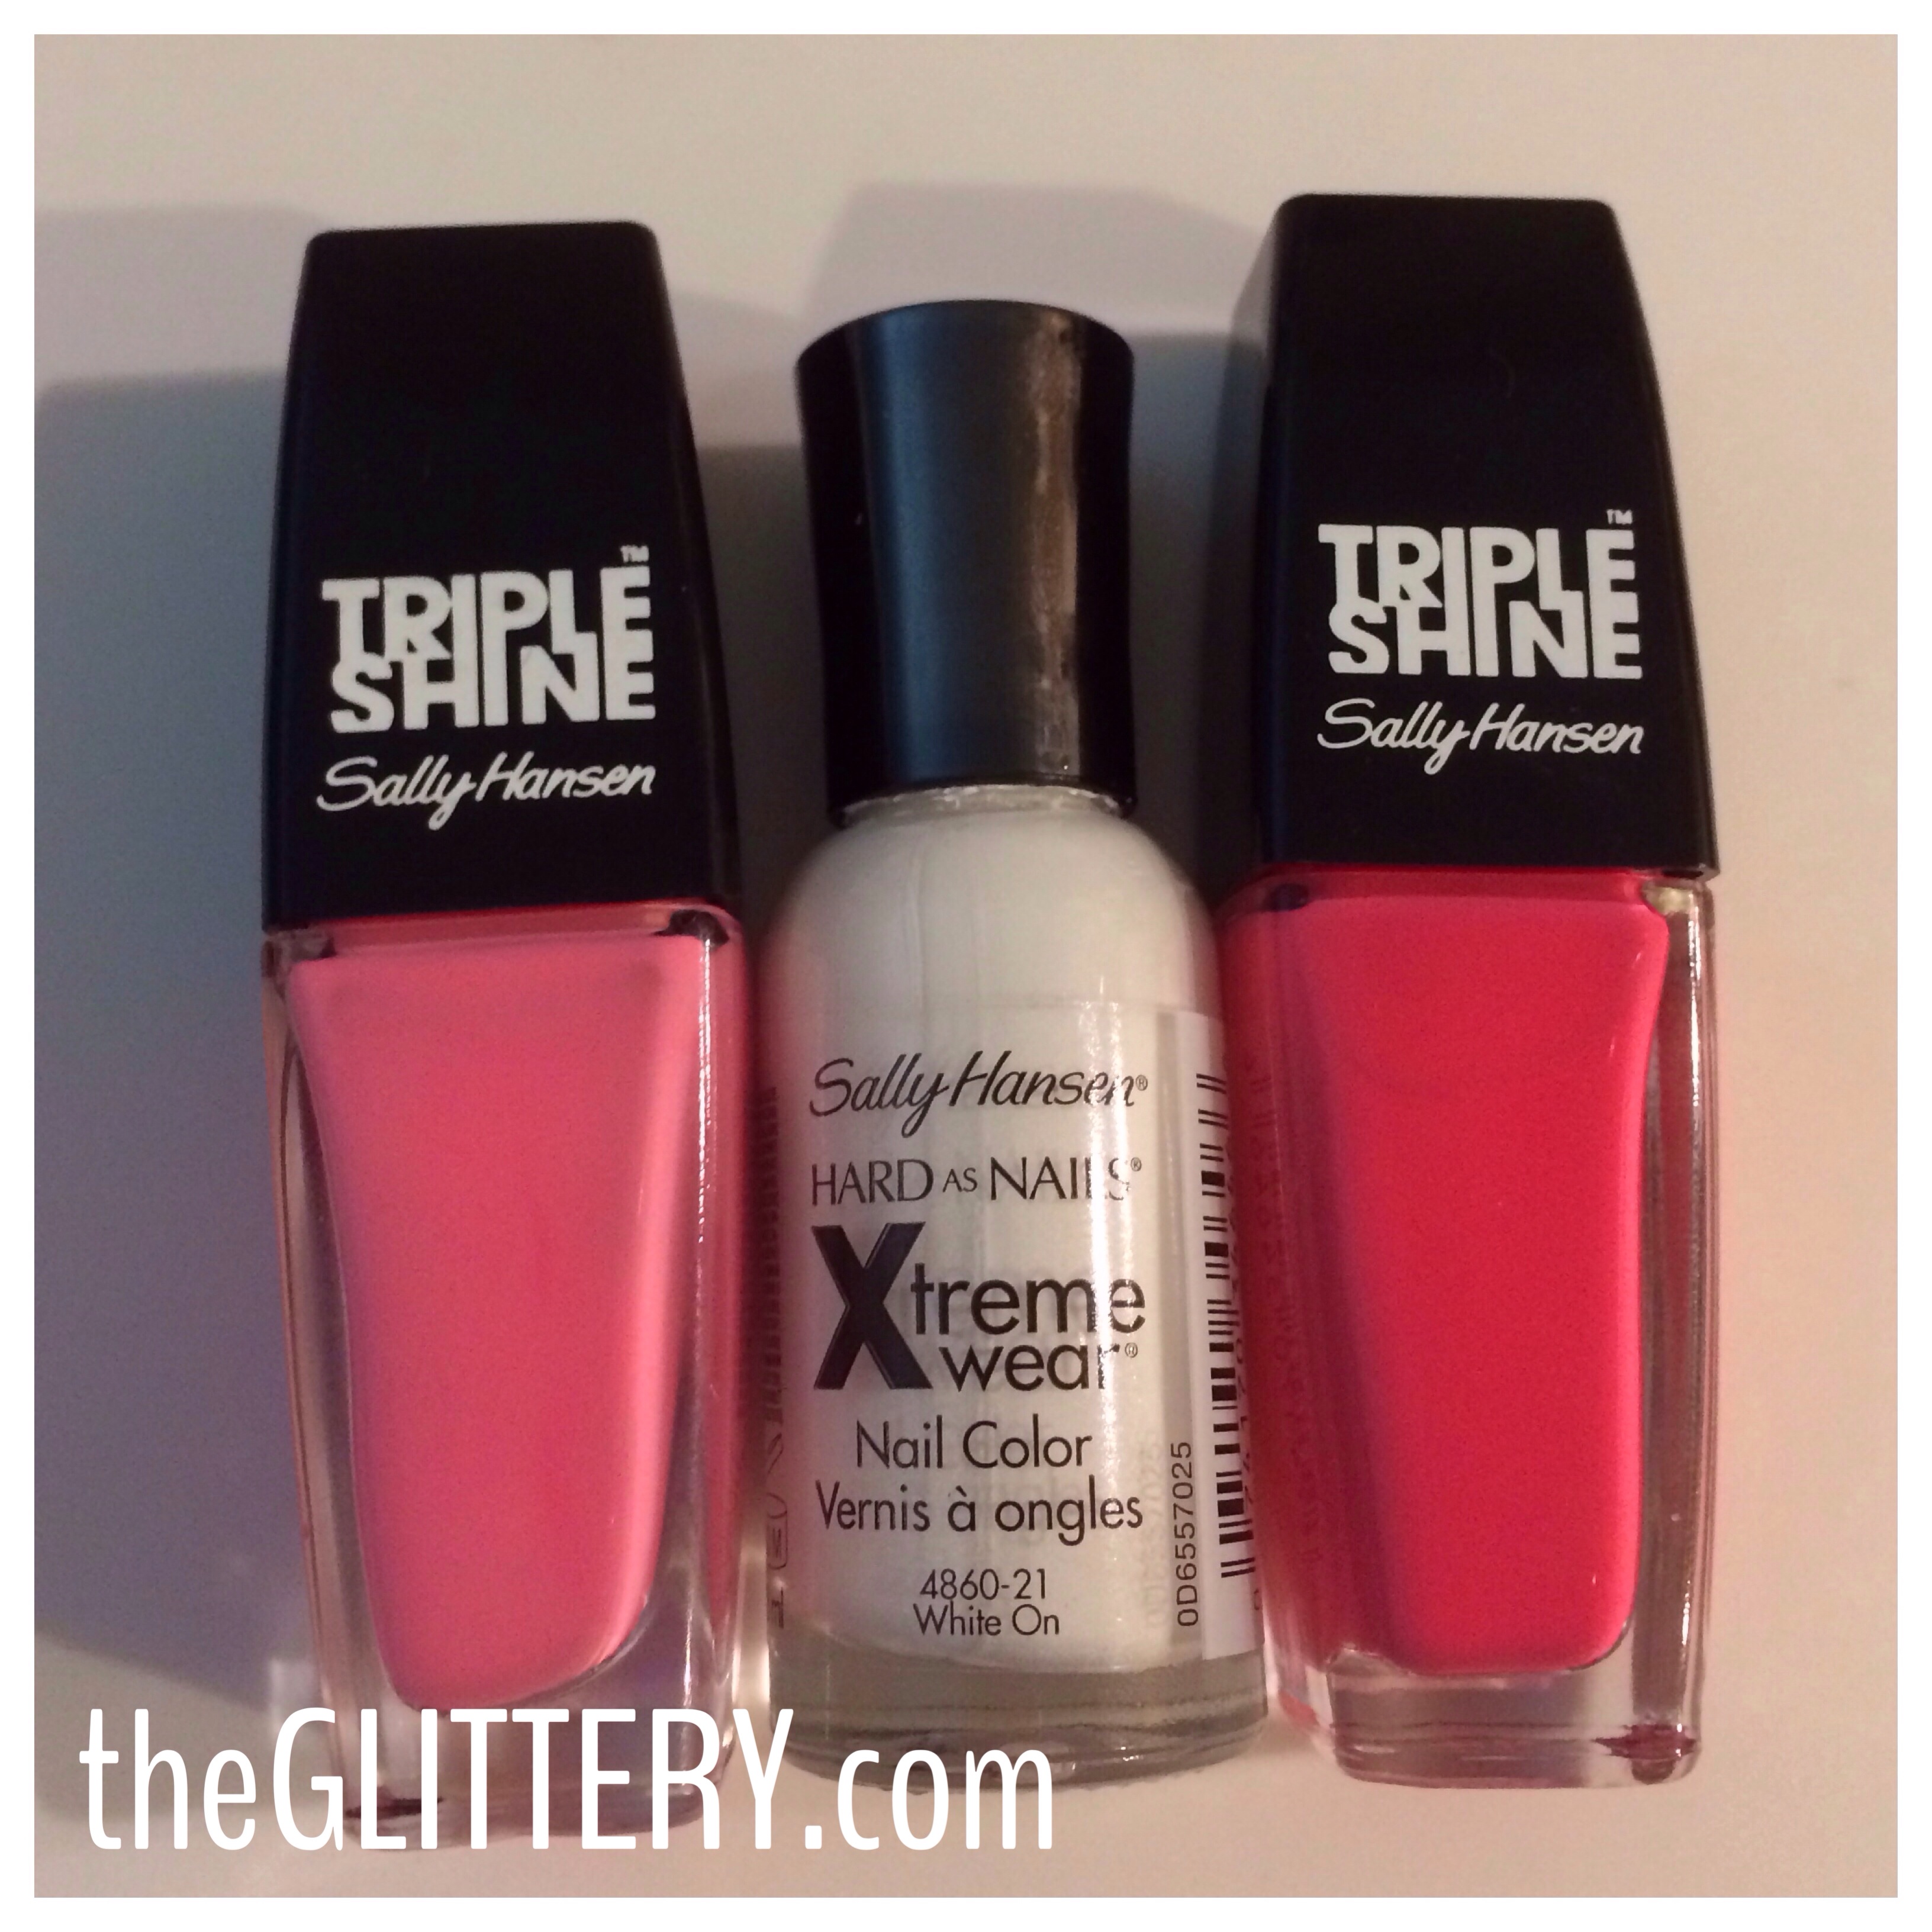
- CND Stickey Base Coat
- Seche Vite Top Coat
- Sally Hansen Xtreme Wear, White On
- Sally Hansen Triple Shine, Pixie Slicks
- Sally Hansen Triple Shine, Reef-Raf
- Clean Eyeshadow Sponge **this is my FAVE tool to create gradients like this. It’s the perfect size since it’s so close to the actual size of your nail.
- Tinfoil
- Small clean-up brush
- Acetone
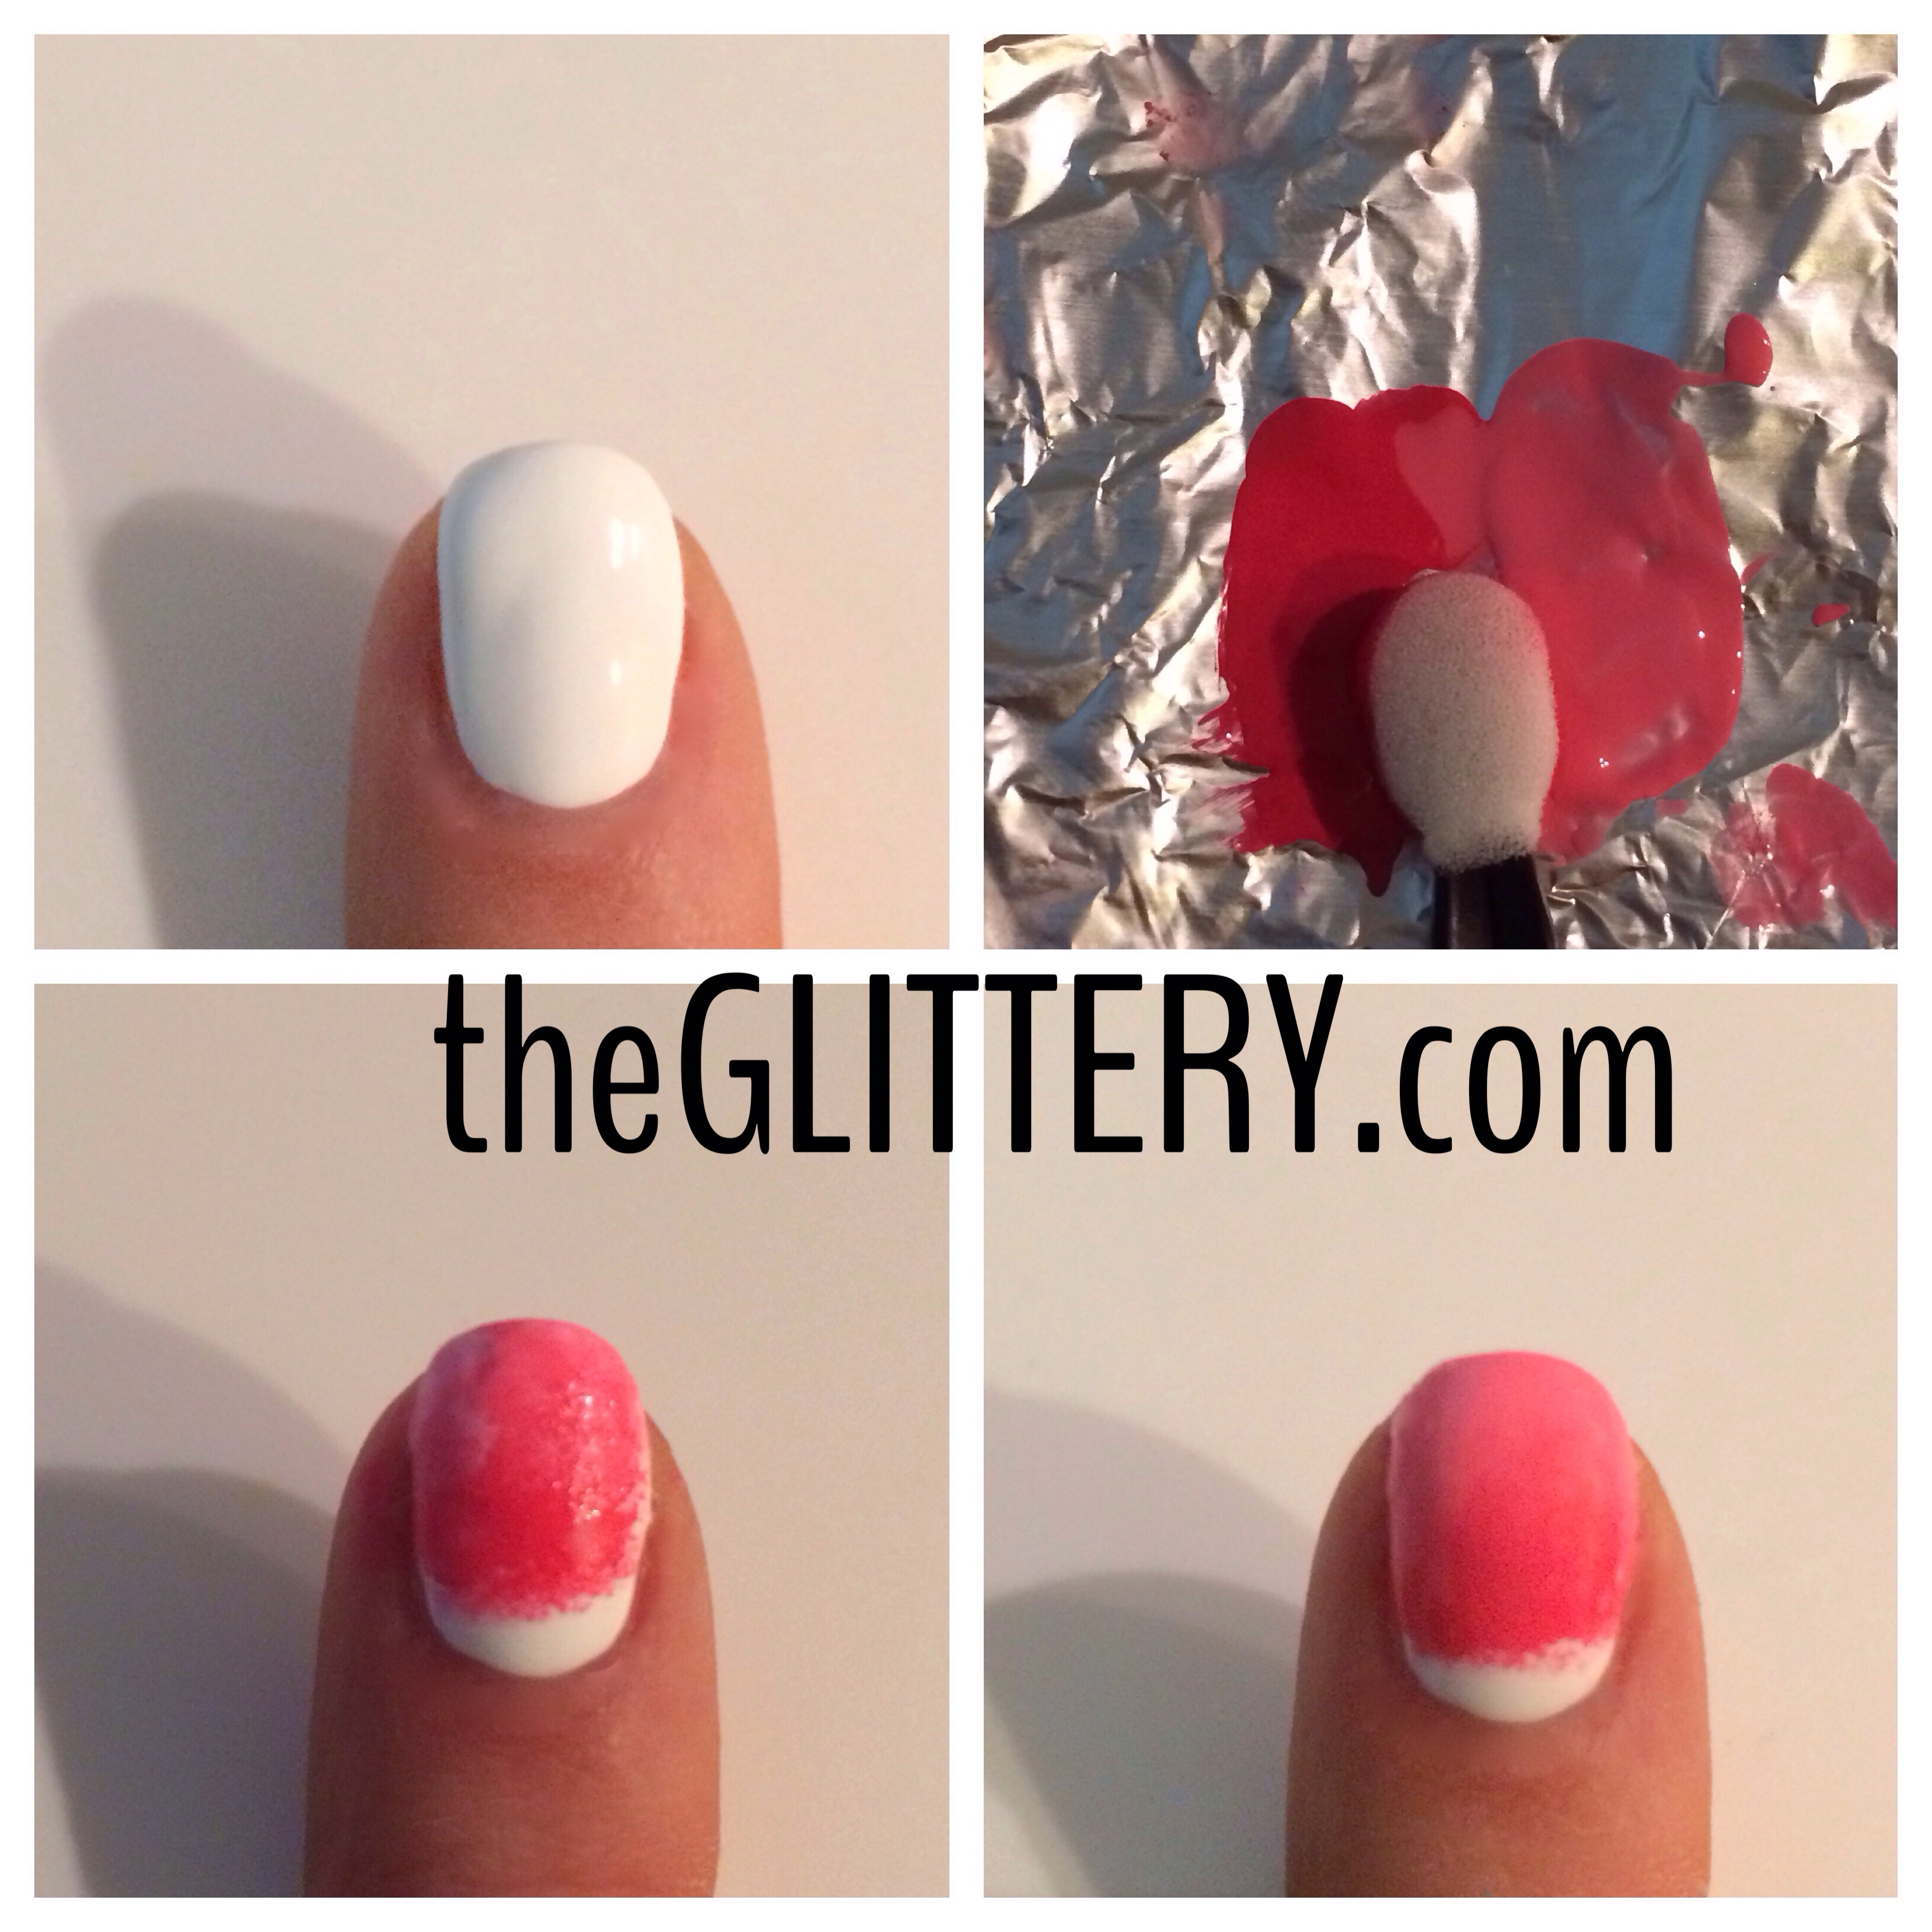
Step 1: After you apply your base coat, apply 2 coats of Sally Hansen Xtreme Wear in White On. Let dry completely (as you know by now, I use a layer of quick dry Seche Vite to speed up the process and smooth out any imperfections).
Step 2: On a small piece of tinfoil, take your 2 pink Sally Hansen Triple Shine polishes and paint 2 vertical lines side by side, making sure they touch. Then dip your eyeshadow sponge right in the center of the liquid so it touches both pinks. You’ll see it creates a nice line.
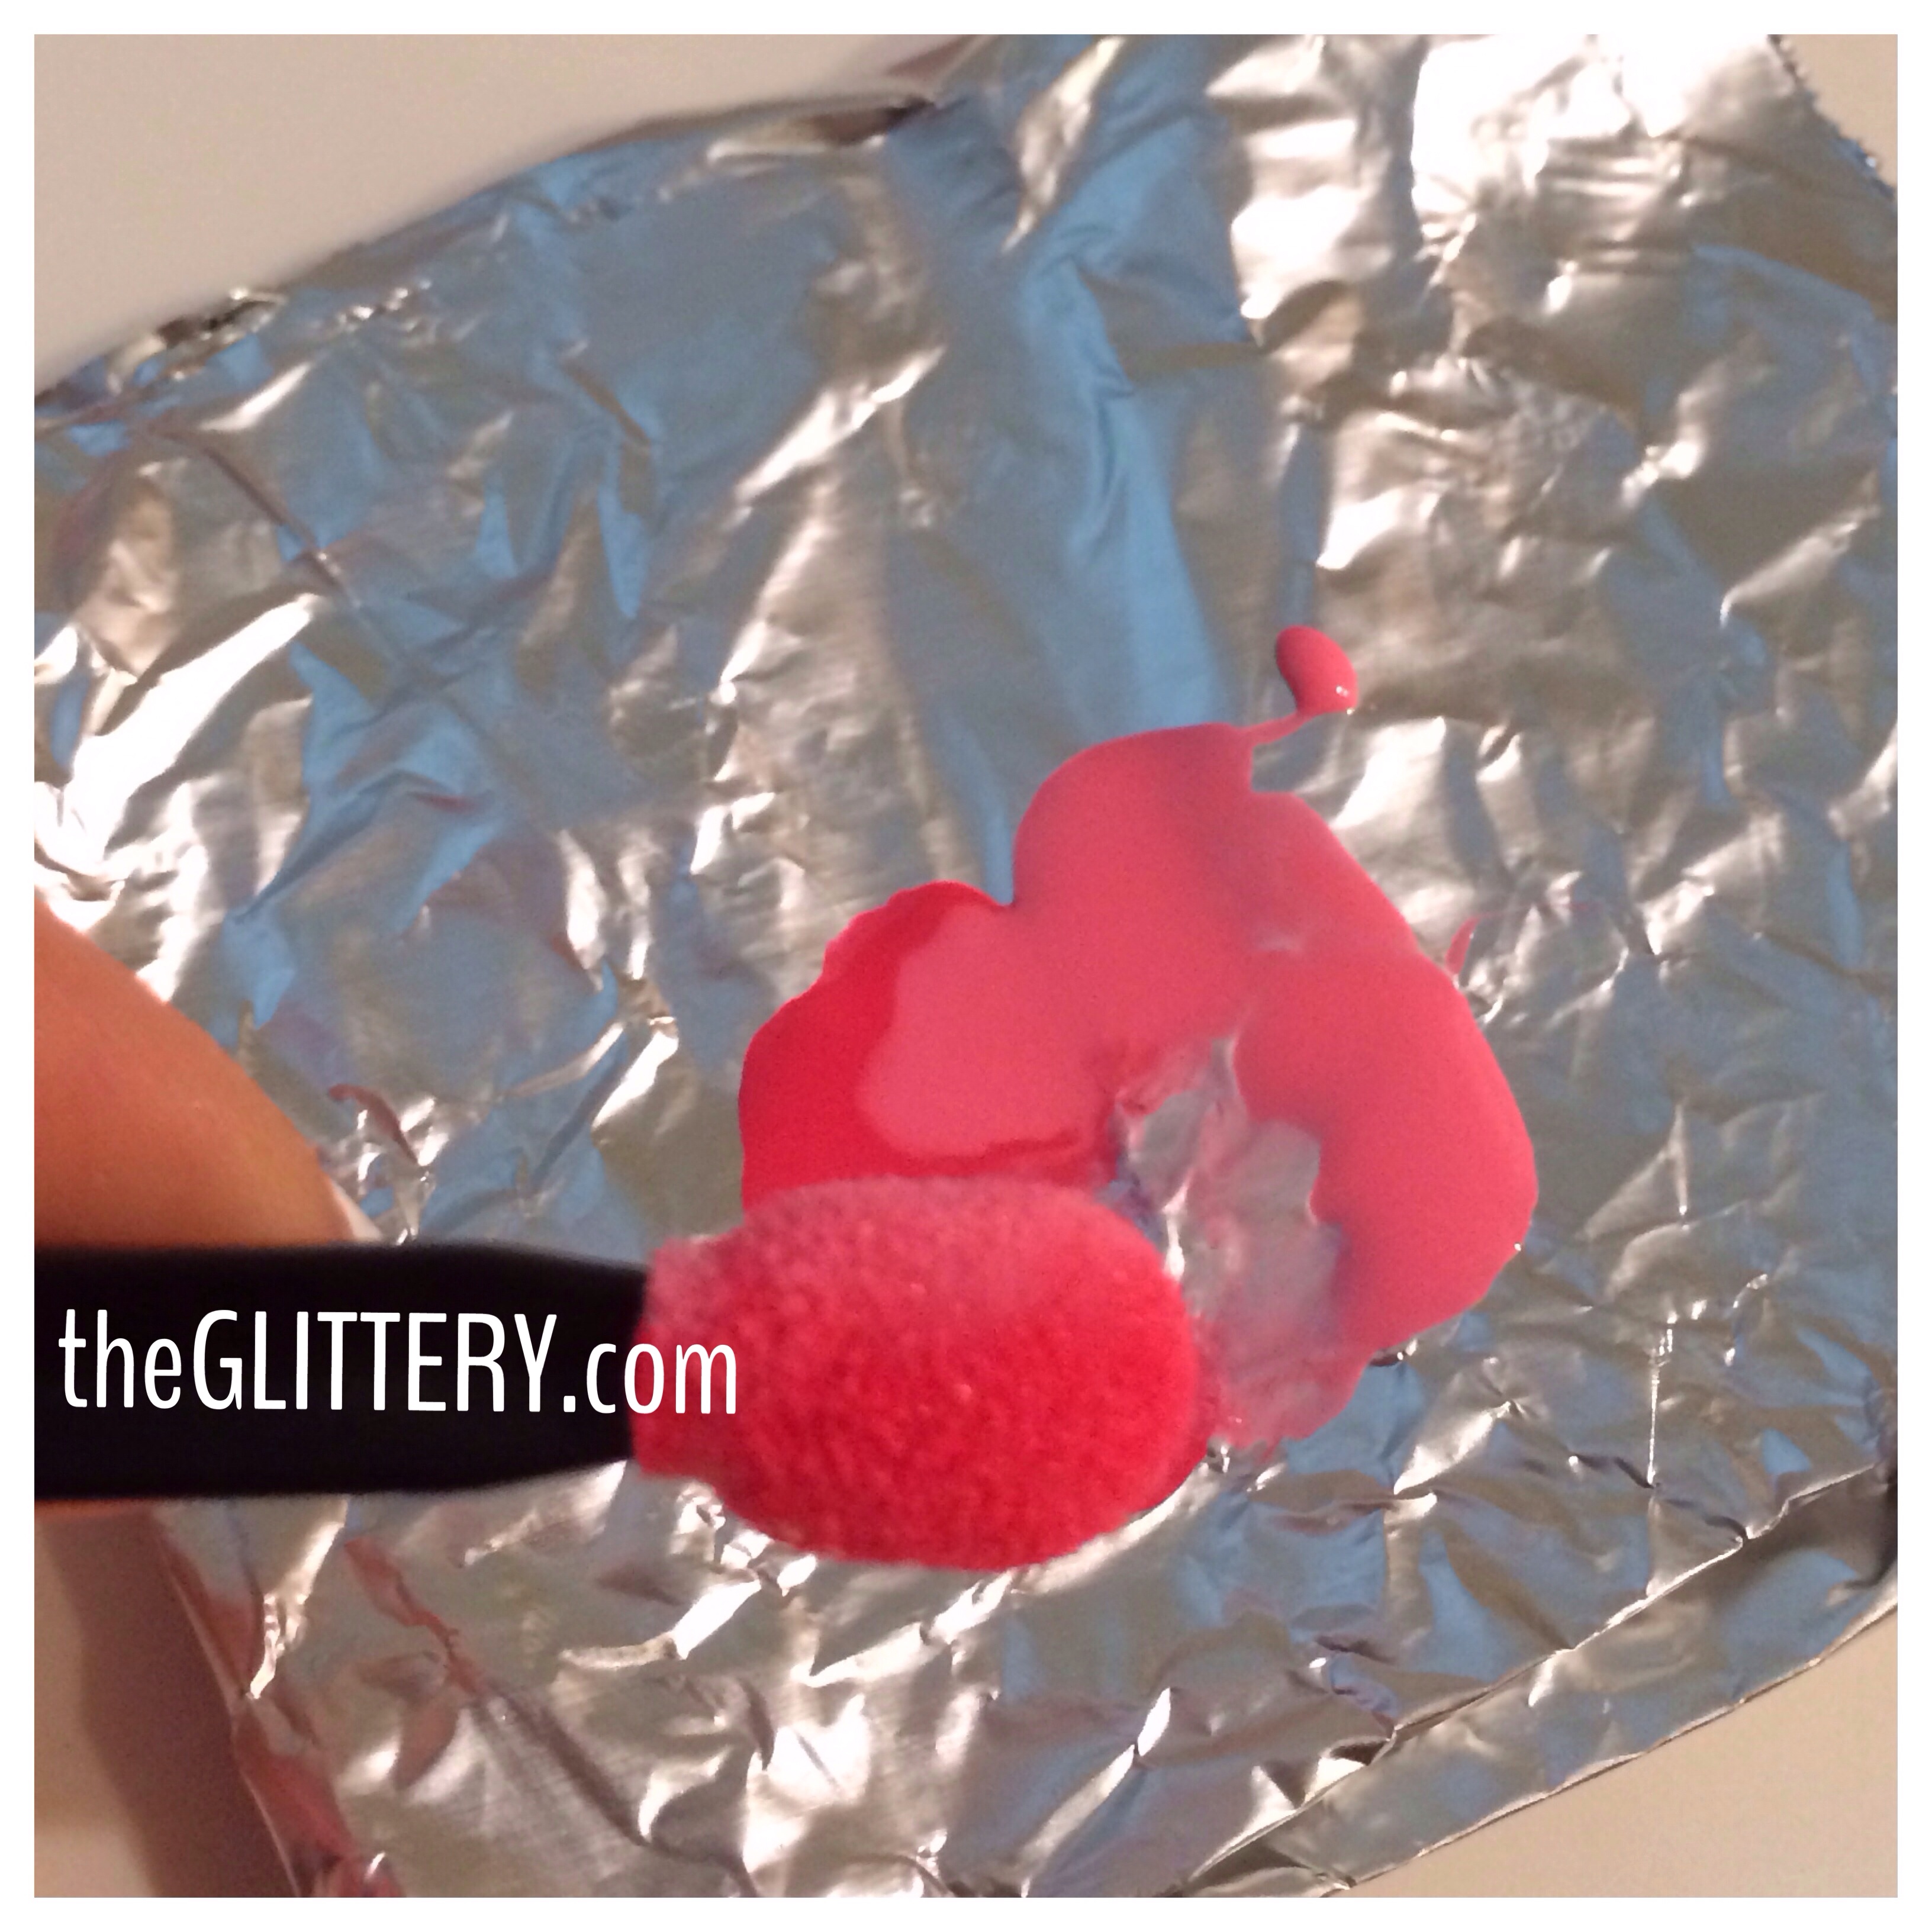
Step 3: Dab your brush on the nail starting slightly above your cuticle (this is how the white stays white at the bottom). For this design, I had my darker pink (Reef-Raf) on the bottom of the sponge and my lighter pink (Pixie Slicks) on the top of the sponge. Keep adding layers and fill in gaps of color as you see fit.
Step 4: After about 1 minute, seal with your top coat. You don’t want to wait until the paint is perfectly dry- the top coat helps blend the 2 colors together and smooth out the entire design.
When done, dip your small clean-up brush in acetone (I find this works better than regular nail polish remover). Gently work around the nail to remove all paint from your skin. When your nails are completely dry, make sure you put on either cuticle oil or hand lotion to moisturize those cuticles. Acetone soaks everything right out of your skin.
All Hearts
Supplies:
- CND Stickey Base Coat
- Seche Vite Top Coat
- Sally Hansen Xtreme Wear, White On
- Sally Hansen Triple Shine, Pixie Slicks
- Sally Hansen Triple Shine, Reef-Raf
- Small Heart Hole Puncher
- Painter’s Tape
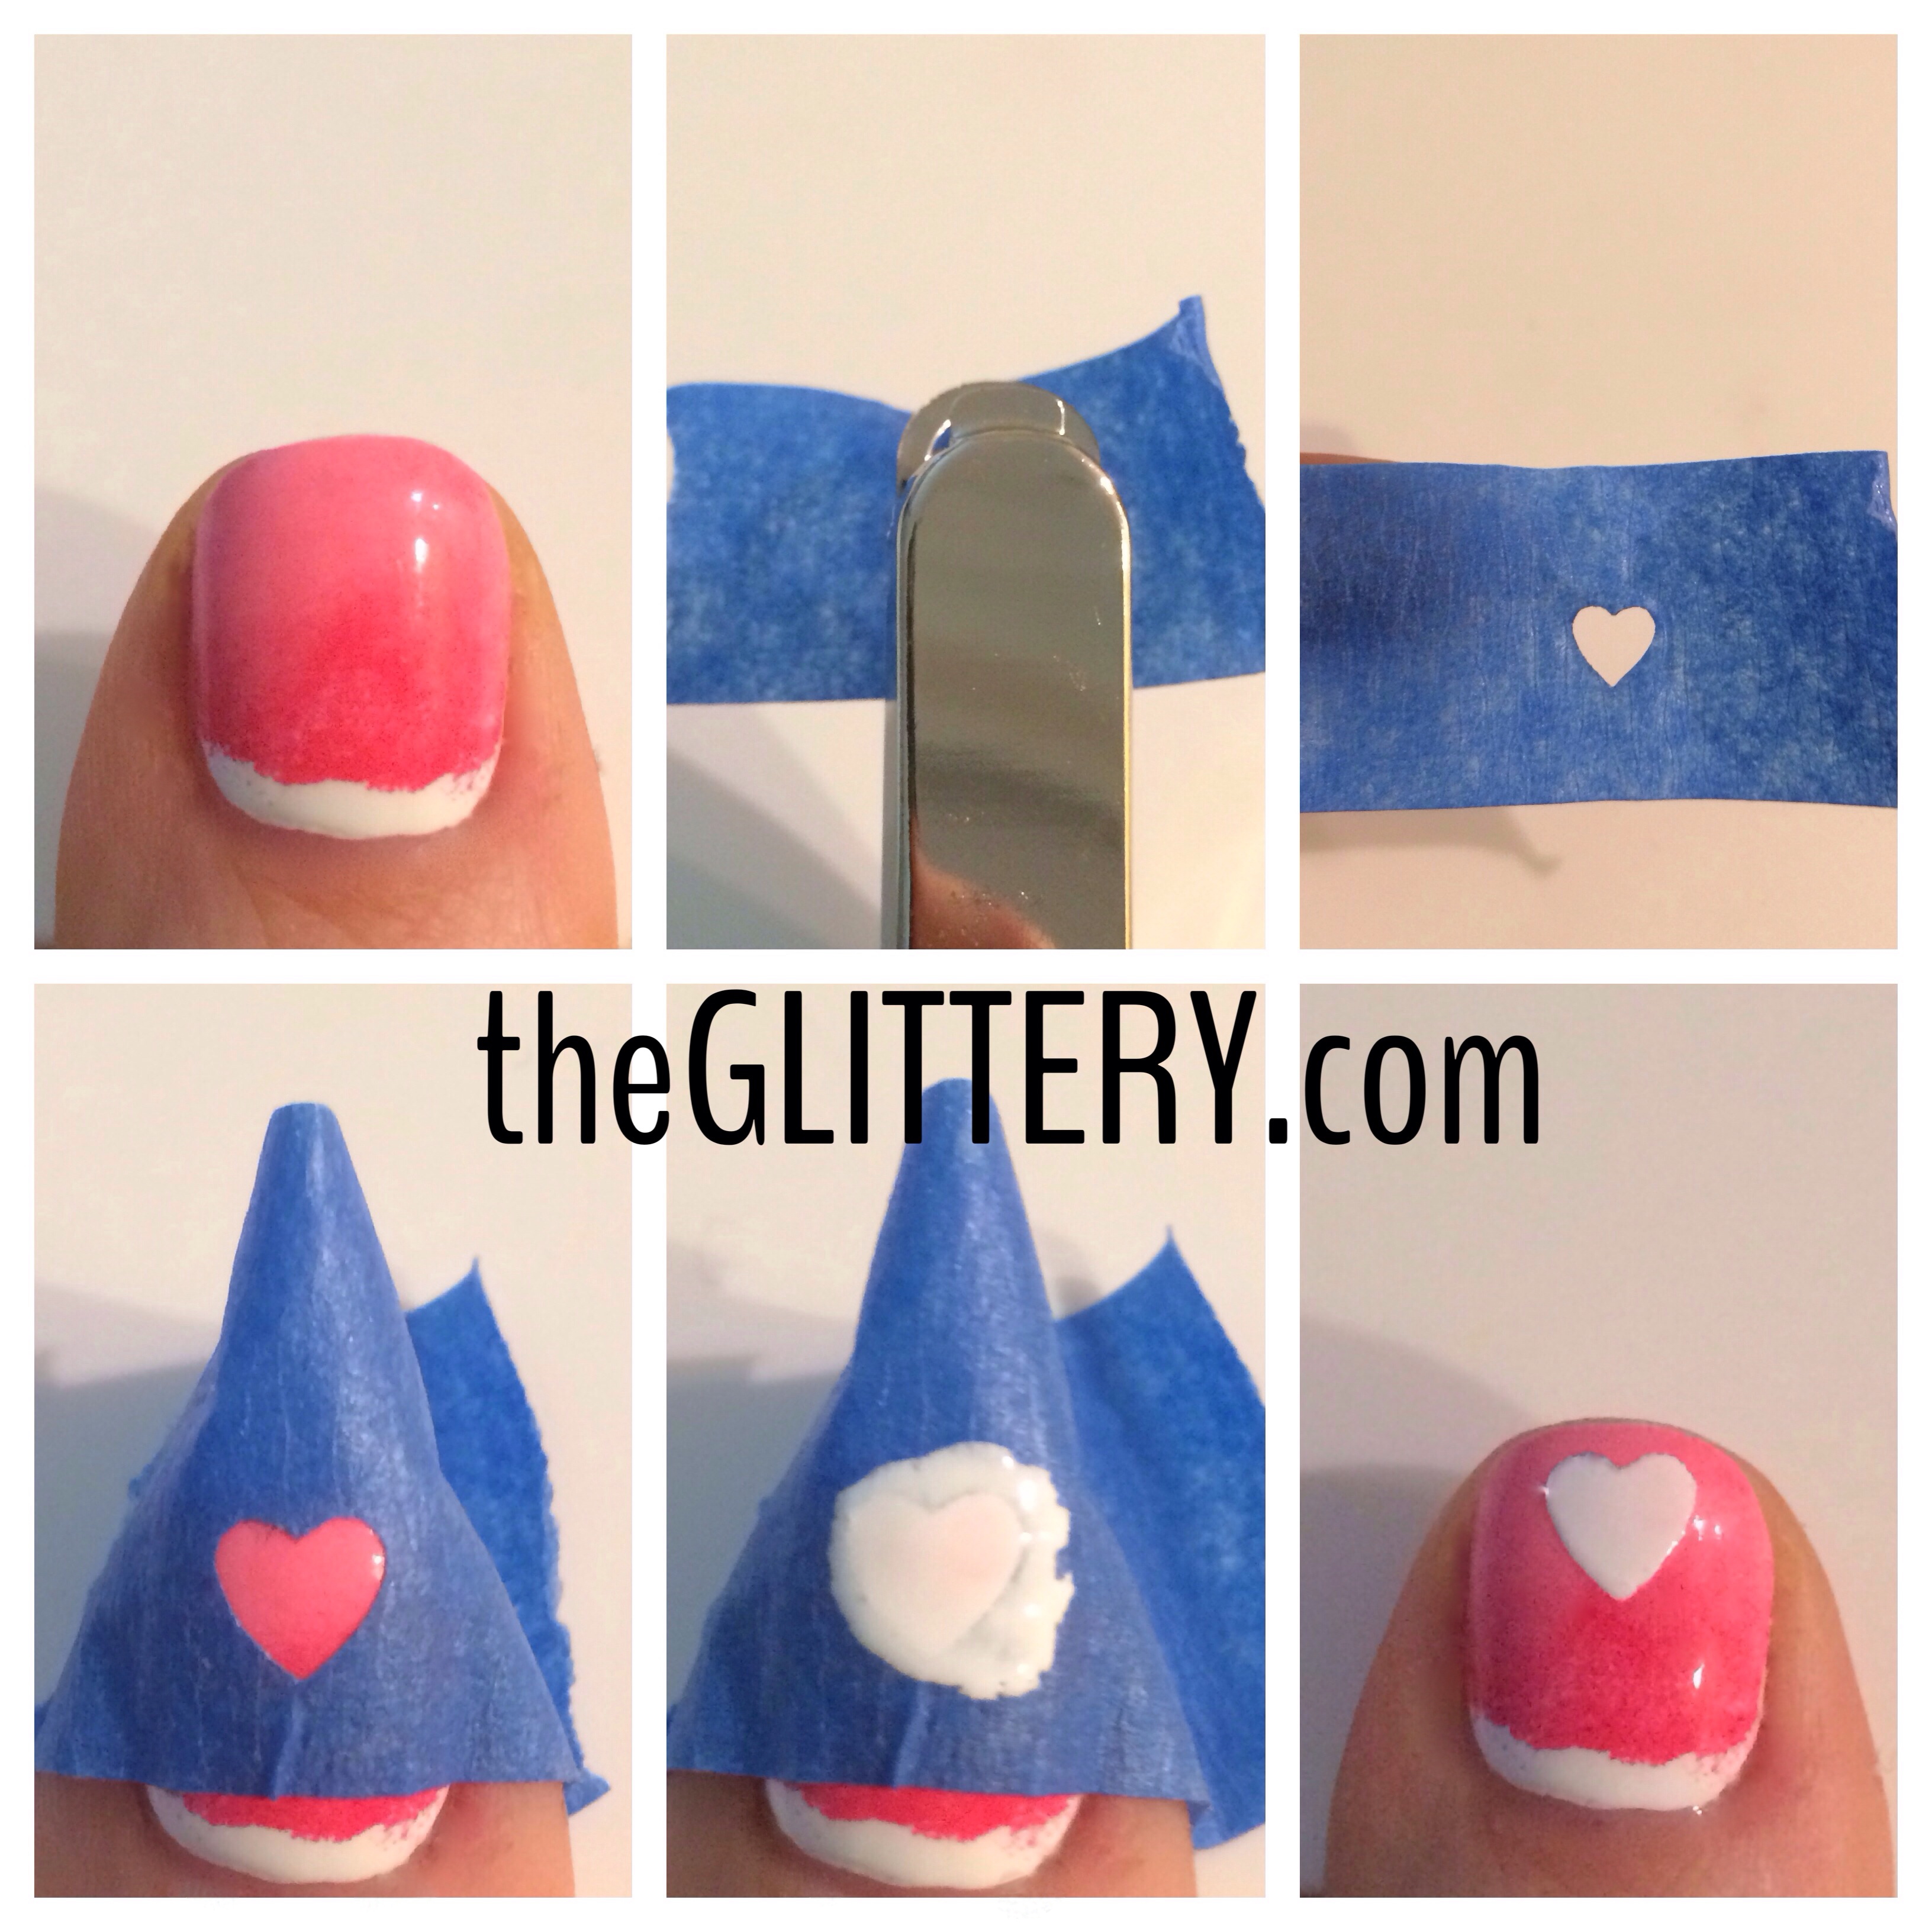
Step 1: After you apply your base coat, apply 2 coats of your solid color (I used Sally Hansen Xtreme Wear, White On). You can then start the heart process (step 2), or you can continue to do your “base” design. In this example, my base design is the ombre from the previous tutorial.
Step 2: Once your base coat is completely dry, rip a piece of painter’s tape (small). You can either put it directly in the heart hole puncher, or you can put it on a piece of wax paper and then put it through the hole puncher. The wax paper is nice because it stops the tape from sticking to the hole puncher. The tape is super easy to tear off the wax paper.

Step 3: Press your heart-shaped tape on your nail. Really stick it on there so that all sides of the heart are 100% flat on your nail. If not, the polish will leak through and the heart edges won’t be defined. Then take Sally Hansen Triple Shine in Pixie Slicks and fill in the heart with polish.
Step 4: After a couple of seconds, gently pull off the tape when the paint is still wet. Wait a good 10-15 minutes before sealing with your top coat! You want to make sure the heart doesn’t bleed…especially on Valentine’s Day! 😉
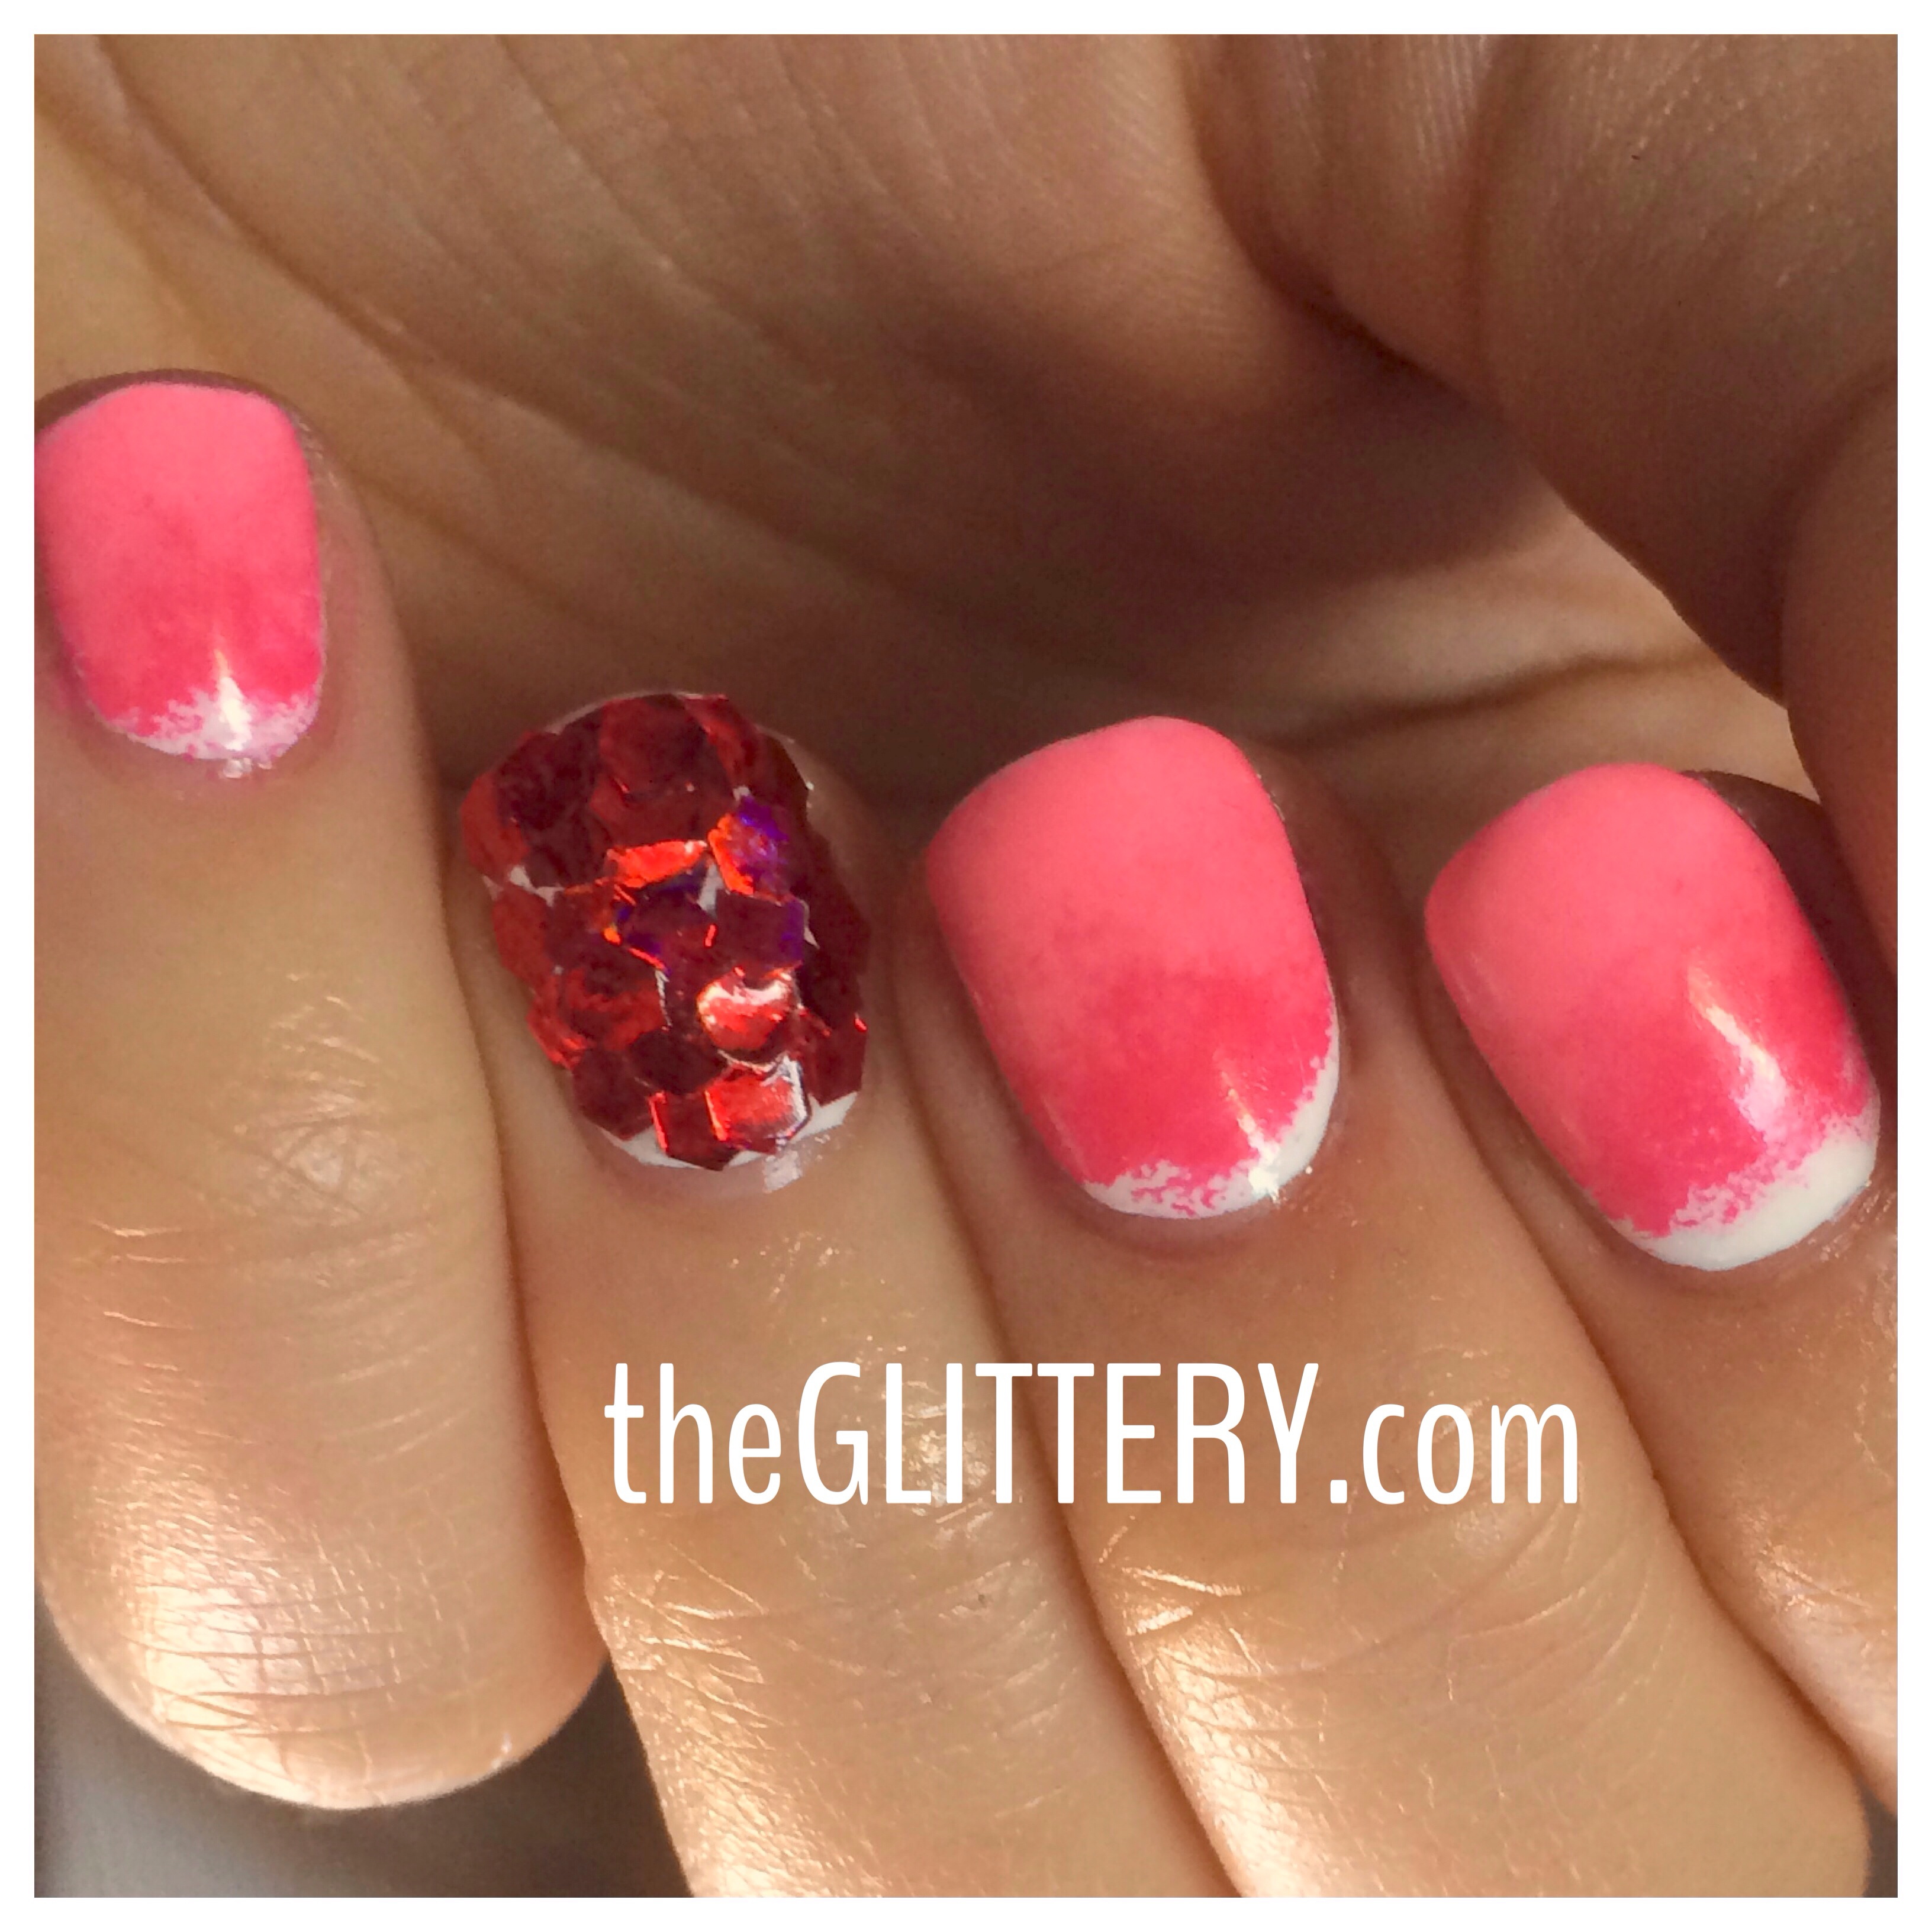
Sequin Accent
- CND Stickey Base Coat
- Regular Top Coat (not a quick dry or else it’ll dry by the time you get all your sequins on)
- Seche Vite Top Coat (quick dry)
- A Solid Color (I used Sally Hansen Xtreme Wear, White On, but you can use whatever you want!)
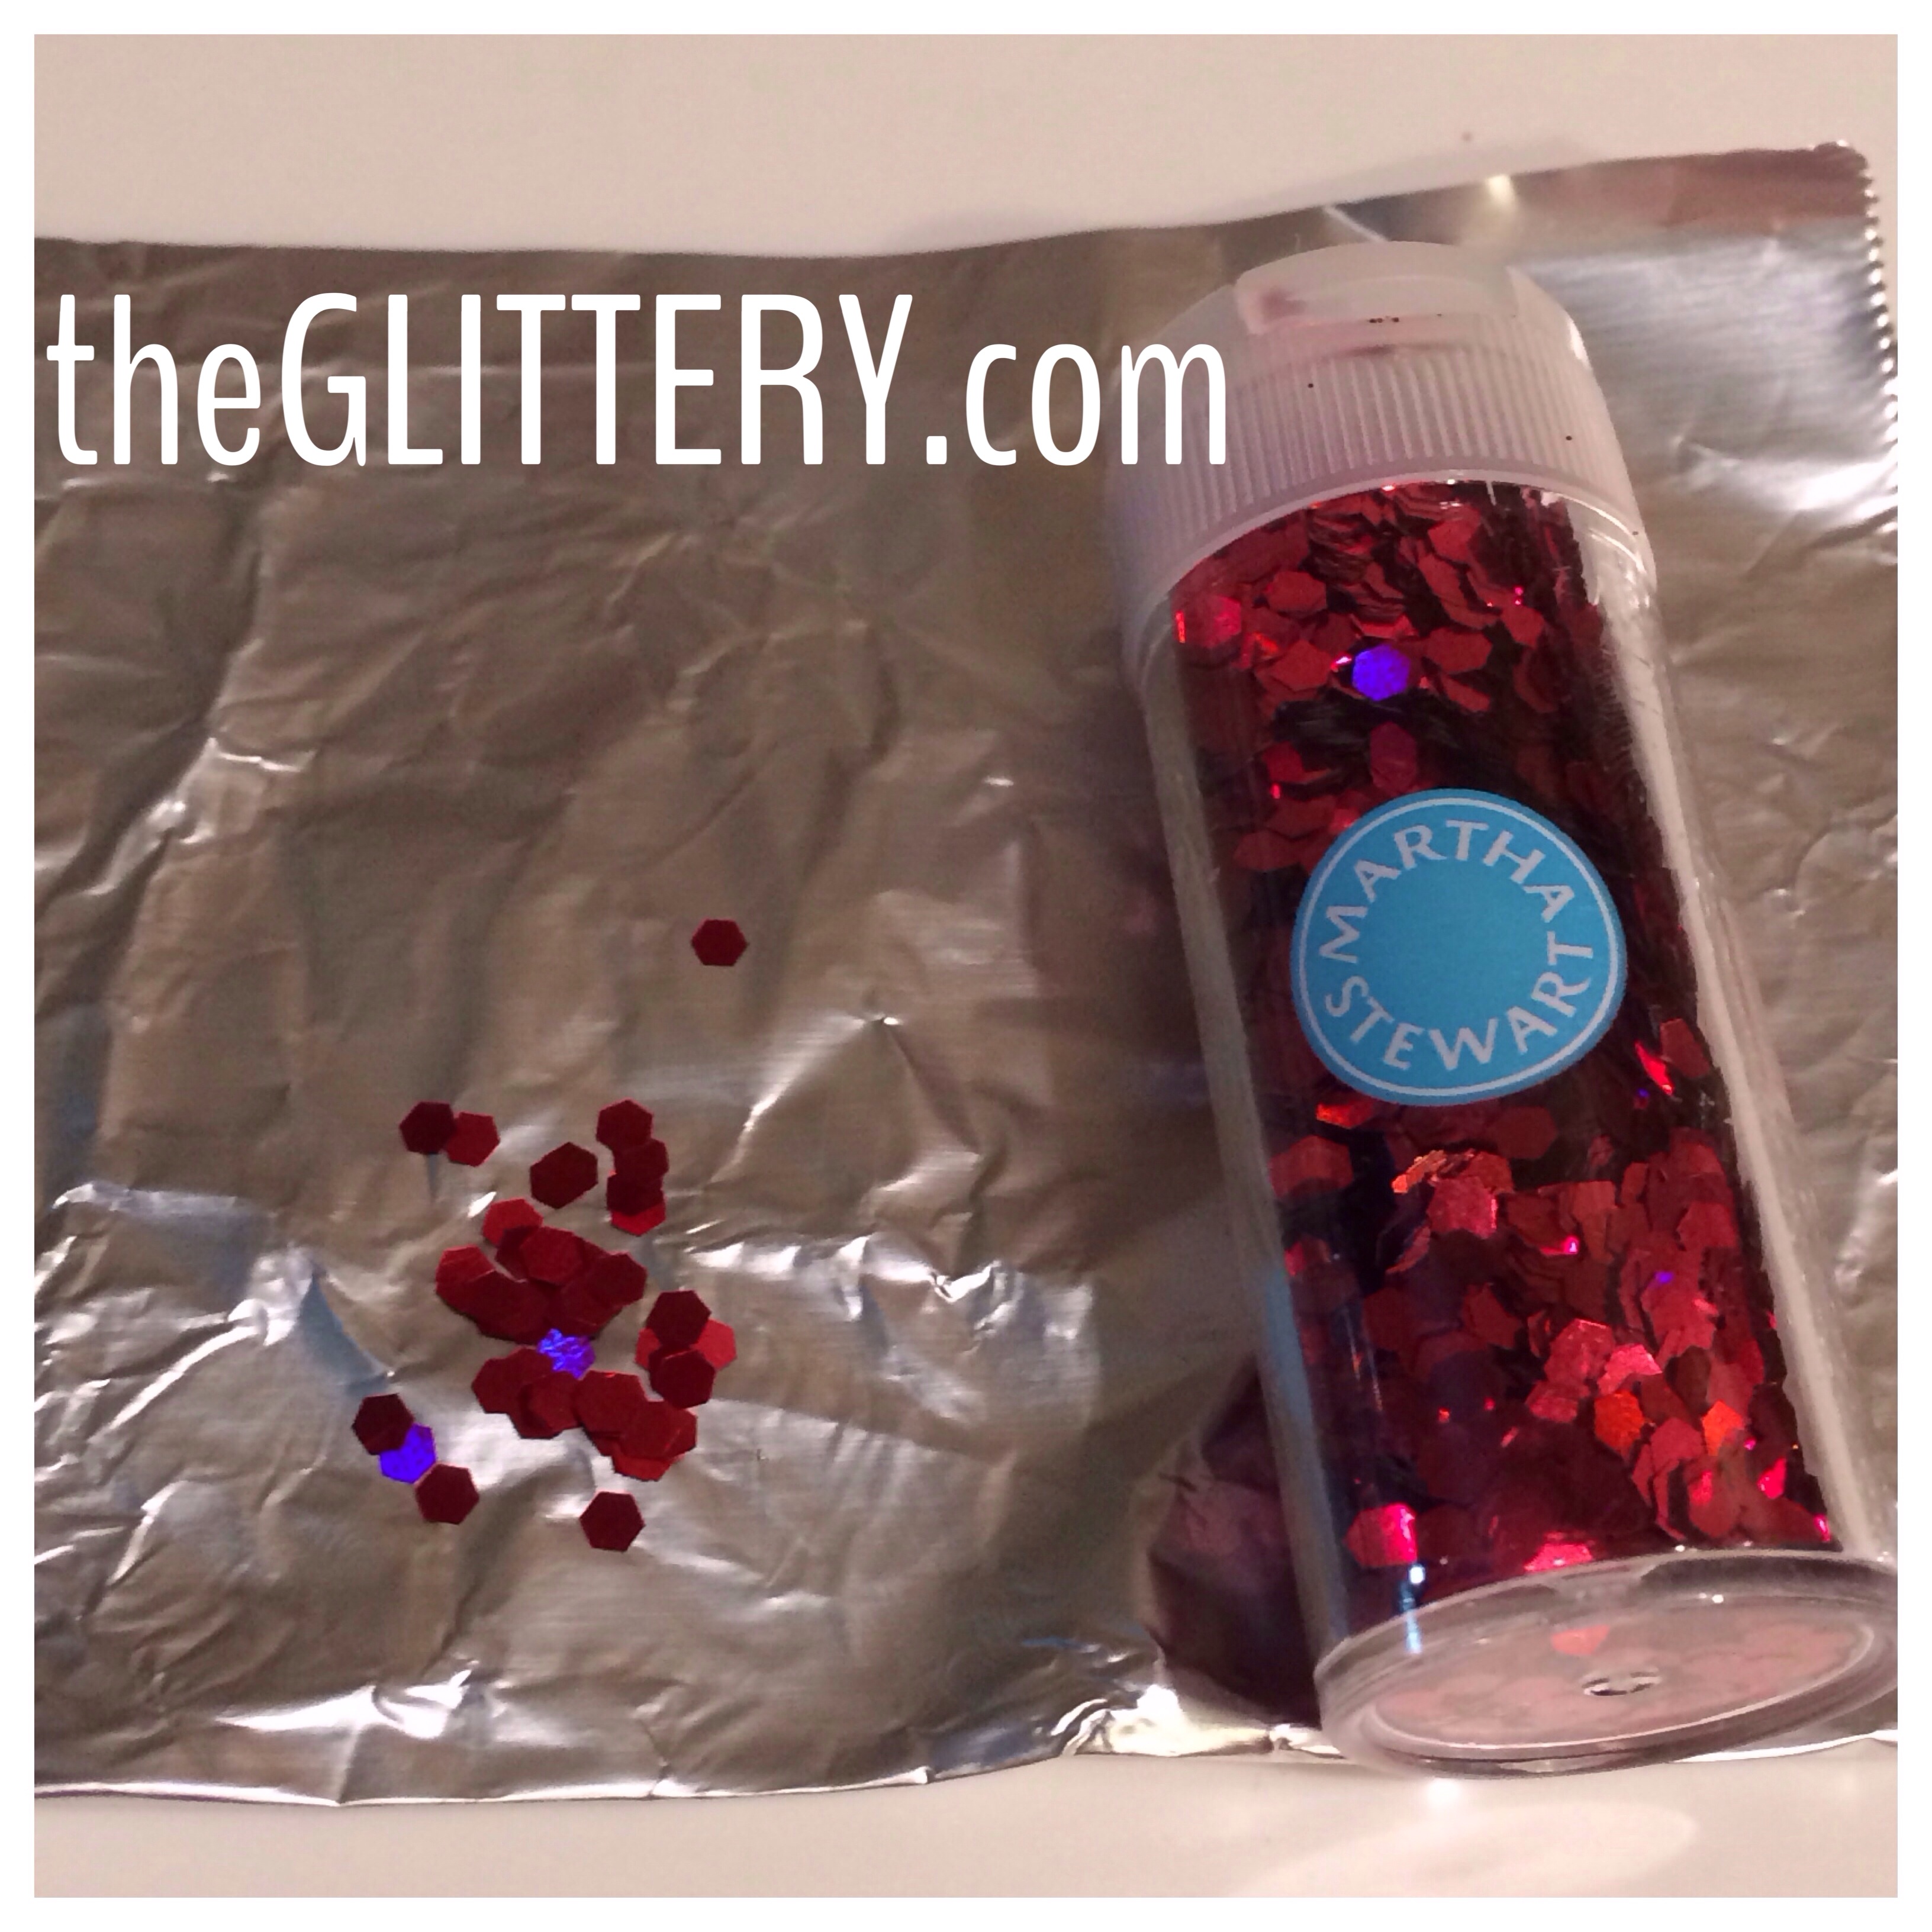
- Martha Stewart Red Sequins (or any sequins you have)
- A toothpick
- Tinfoil
Step 1: After you apply your base coat, apply 2 coats of your solid color. Let it dry completely.
Step 2: Pour a bunch of red sequins on a piece of tinfoil. Apply 1 thin layer of top coat (not a quick dry) on top of your white nail. Take your toothpick and either wet it a little with your tongue (or top coat) and dab a sequin to pick it up and place it on the nail. Continue to do this until your entire nail is covered in sequins.
Step 3: Once all sequins are in place, take your quick dry top coat and do 1 thick coat.
Now you’re ready for Valentine’s Day!