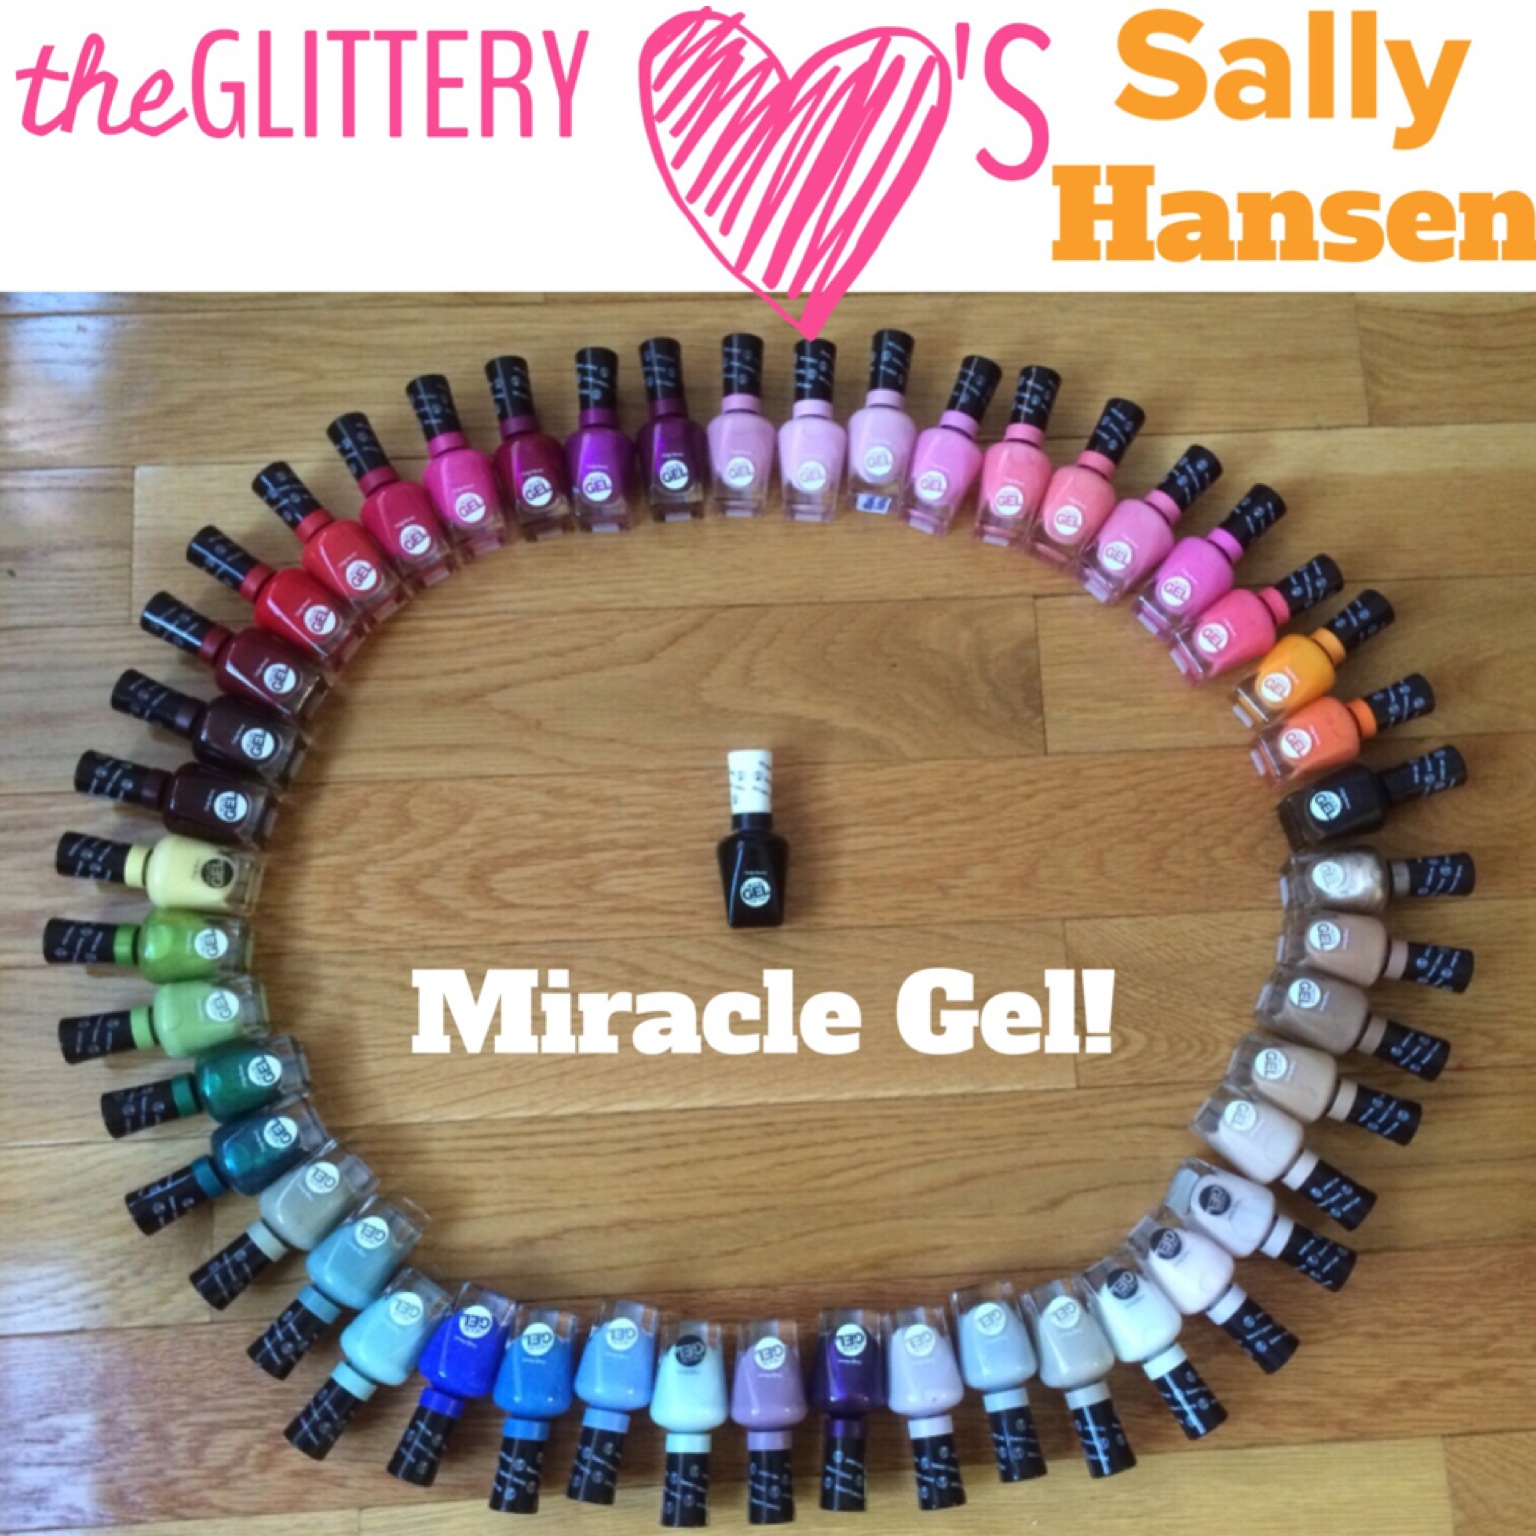
Sally Hansen recently launched its new Miracle Gel line, answering every girls’ nail polish prayers- a gel manicure with no light needed! Before I share this week’s nail art tutorial, let me break down this genius product for you…
1. Again, there’s no light needed! This part is so exciting, it’s worth repeating. It’s just like painting your nails regularly except you get the added/free bonus of it being a gel manicure! Aka you get long-lasting color AND shine for up to 14 days!
2. It’s only 2 steps–all you have to do is paint 2 coats of the color (it has a built-in base coat) then seal the deal with the gel top coat. THAT’S IT!
3. It removes easily with regular nail polish remover. You don’t have to worry about scraping/damaging your nails!
4. It has that awesome “Sally Hansen” brush that contours to your cuticle for even, streak-free application.
5. Miracle Gel comes in 47 bomb.com shades, divided into 7 color families- LovePink, Flawlessly Nude, Street Pastels, Runway Shock, Daily Delights, Mad Mod & Fired Up Metallics.
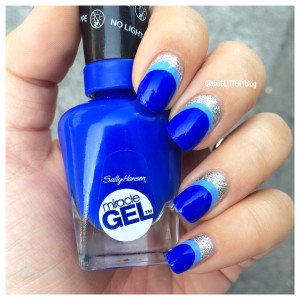
Ok, I’ve kept you waiting long enough! This week’s tutorial of course uses Miracle Gel and is inspired by the Ruffian Manicure. And guess what, no tools are needed! The tool is your Sally Hansen brush!

Supplies:
- Sally Hansen Miracle Gel, Sugar Fix
- Sally Hansen Miracle Gel, Tidal Wave
- Sally Hansen Miracle Gel, Top Coat
- Marc Jacobs, Glinda
Tutorial:
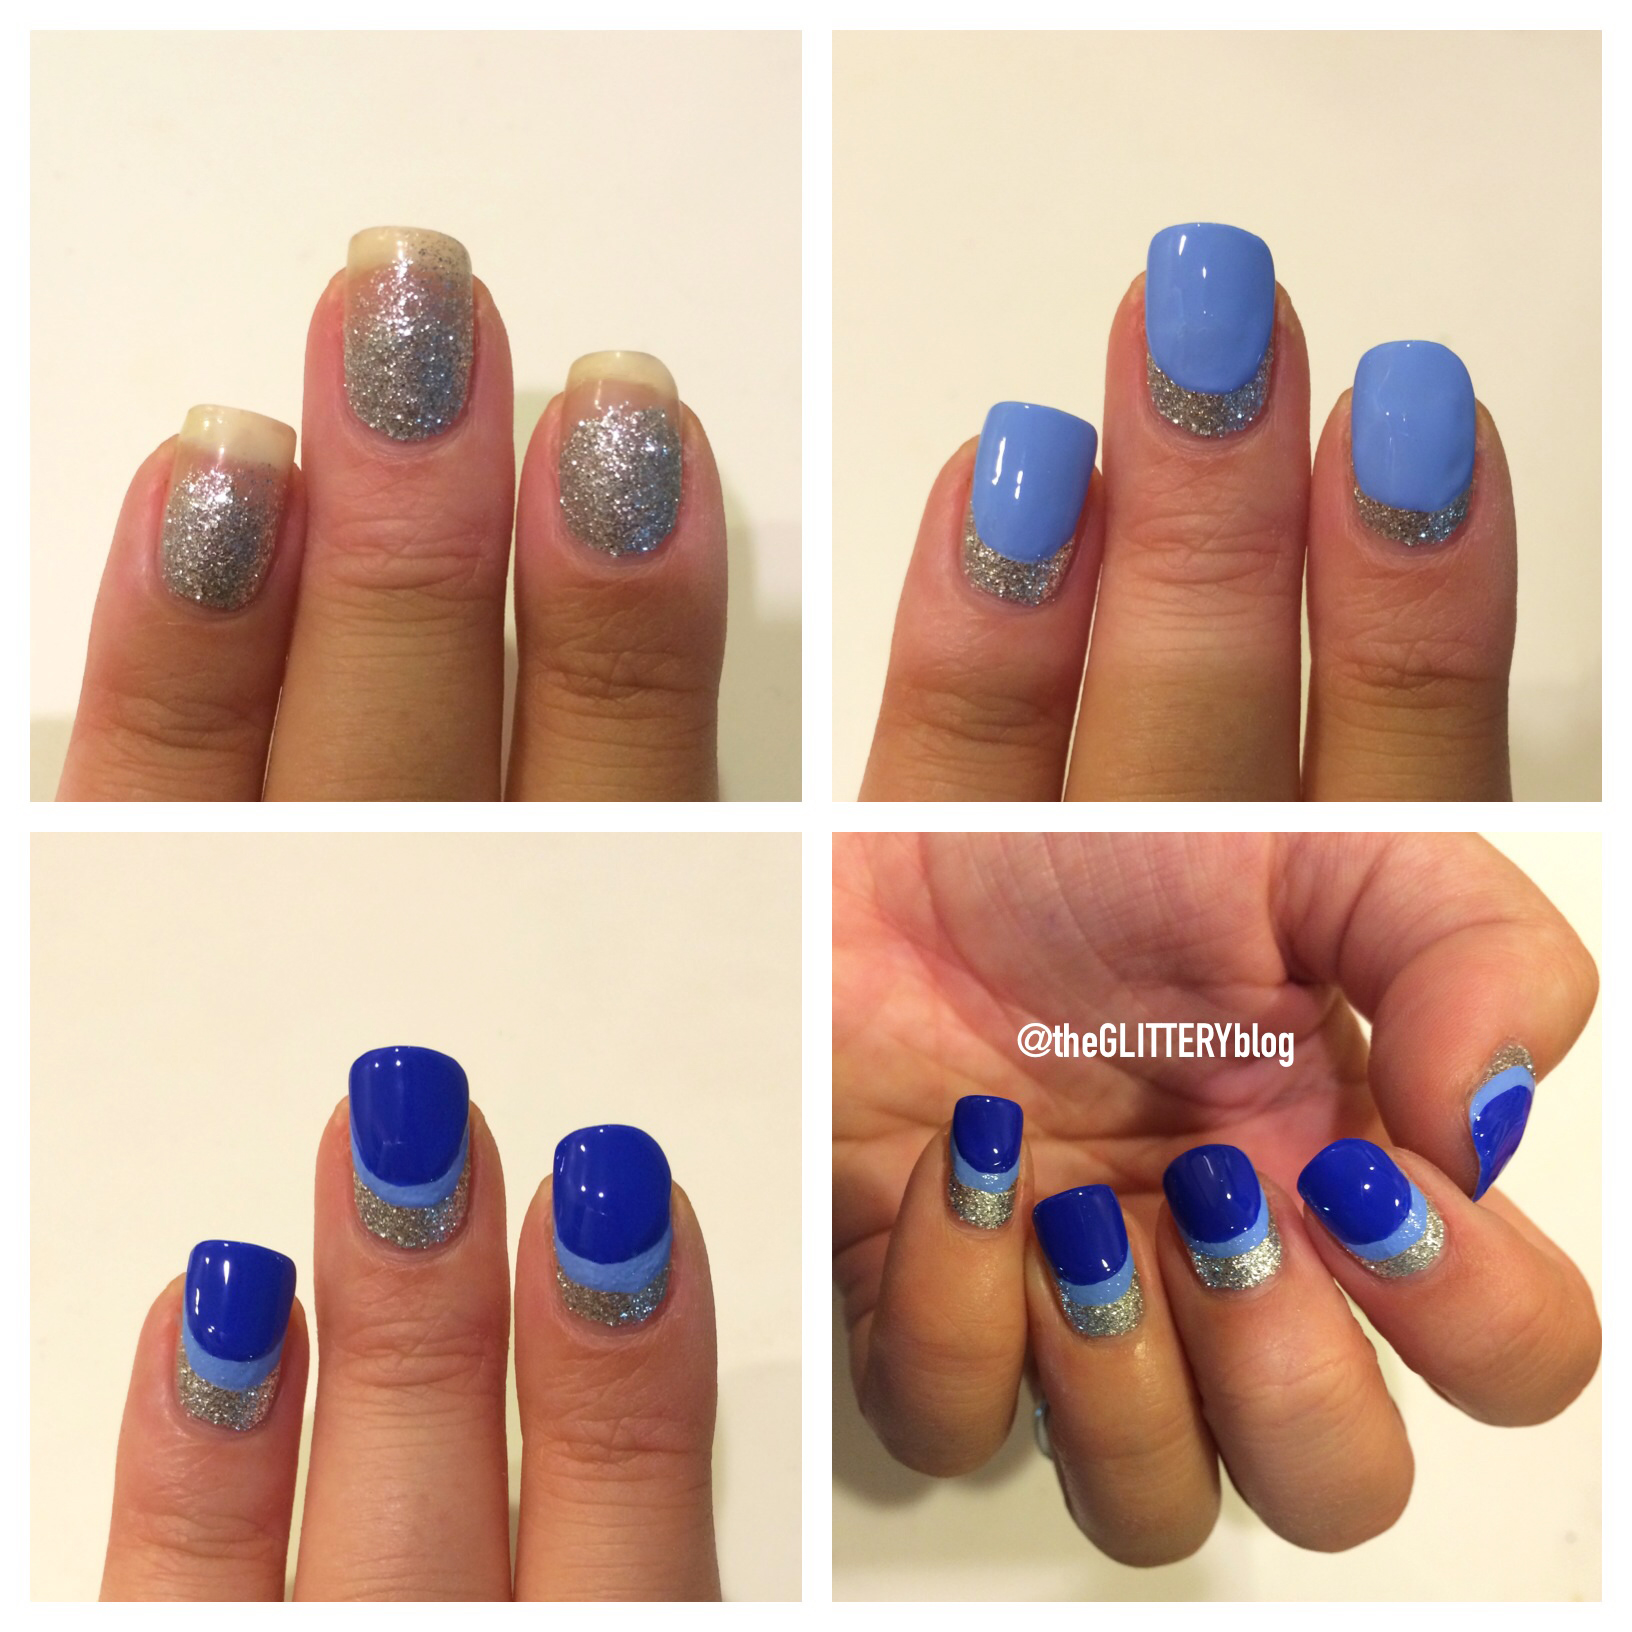
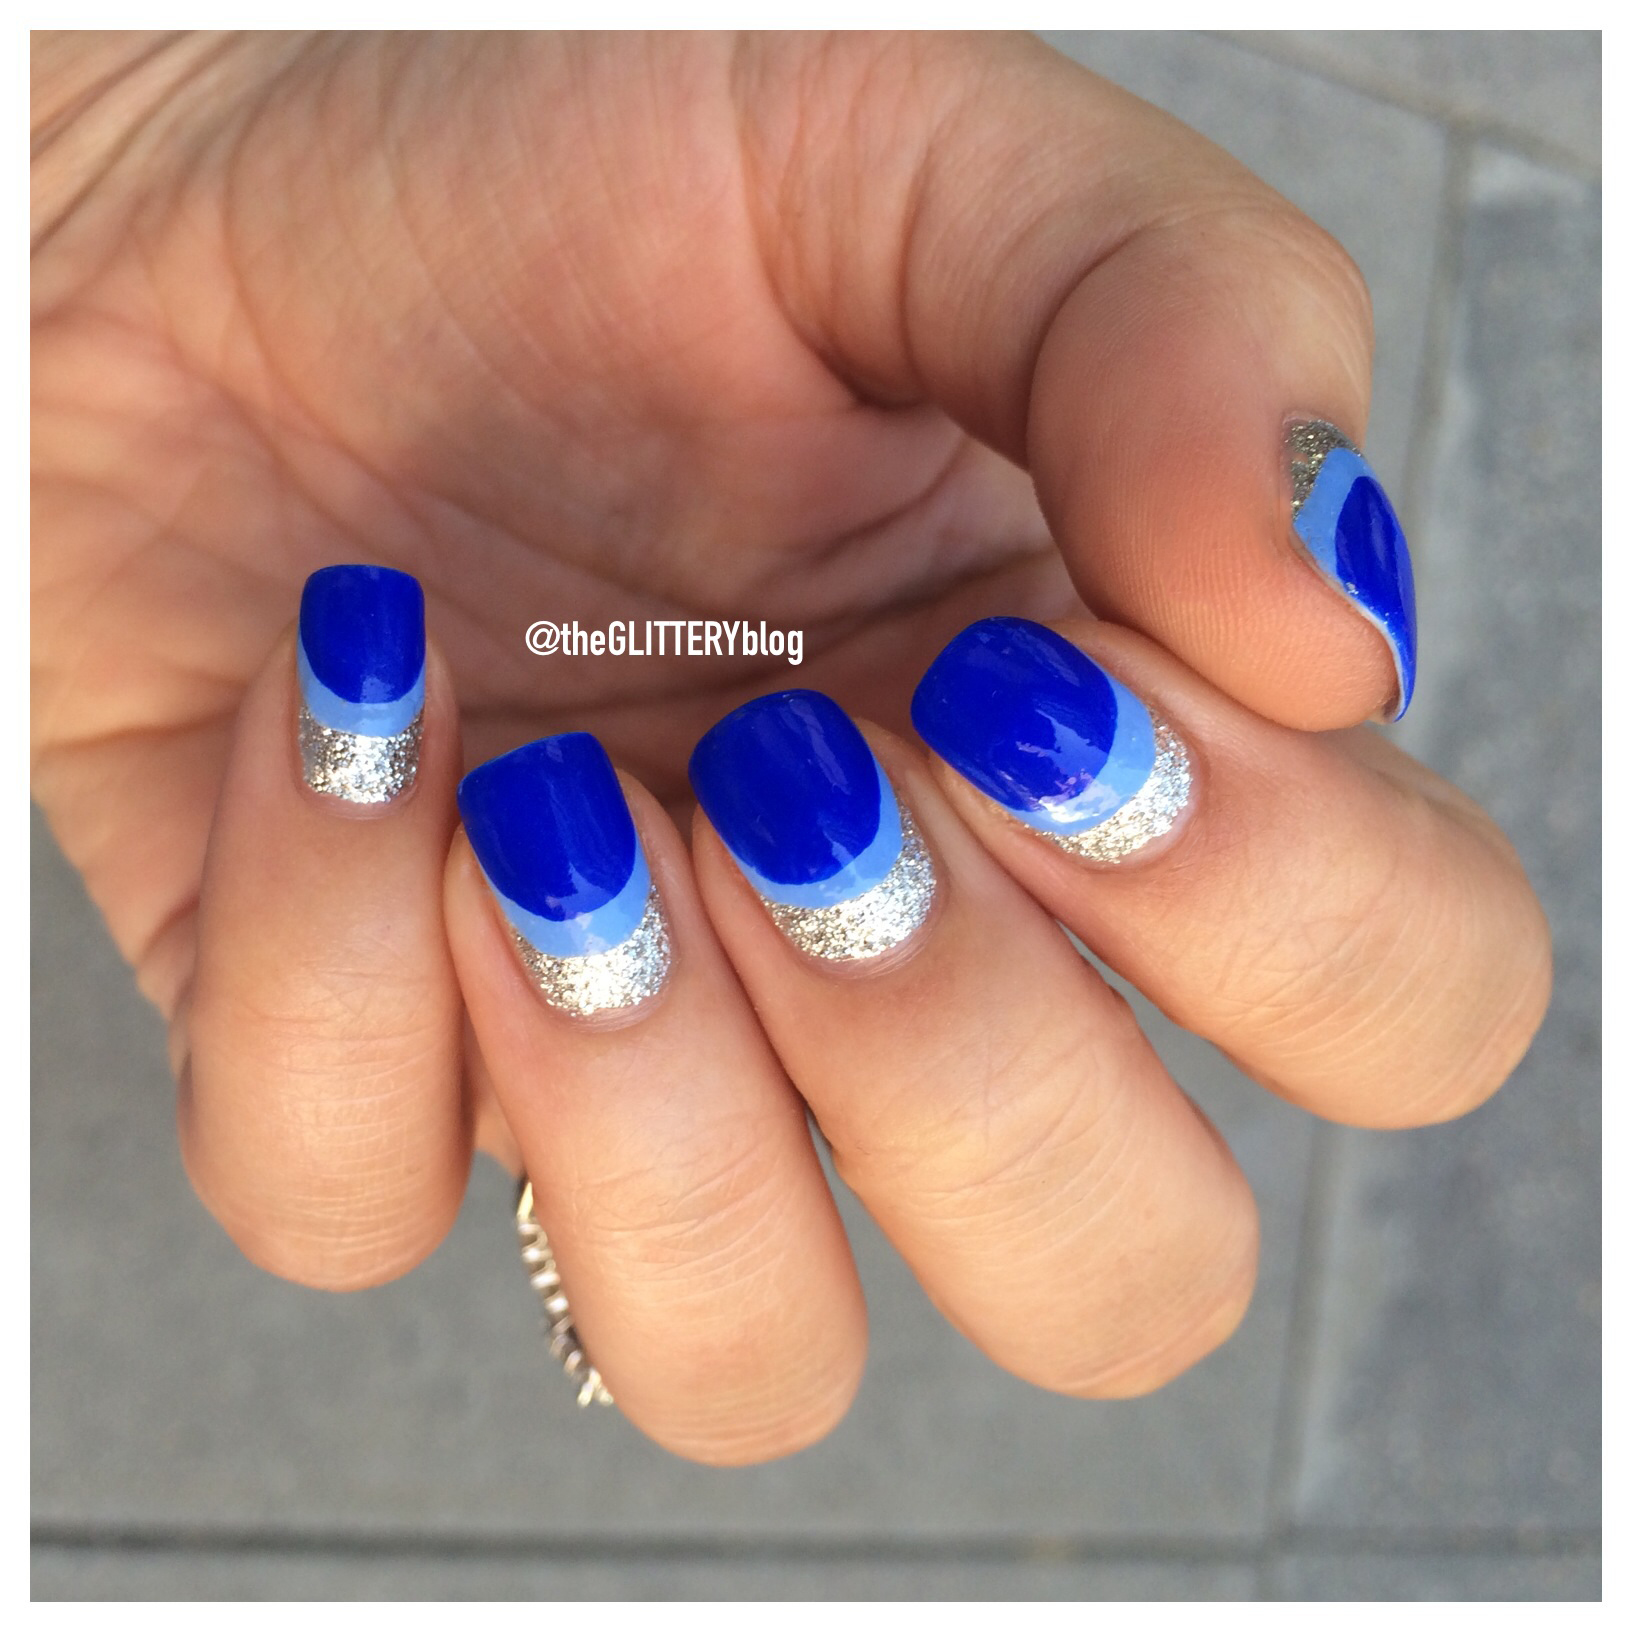
Step 1: Paint 2 coats of Marc Jacobs, Glinda. You don’t need to go to the top of your nail because it will end up being covered by your Miracle Gel. Just make sure the “sparkliest” part is near your cuticle since that’s what will be shown.
Step 2: Wait a couple of minutes for the glitter to dry. Take your Miracle Gel in Sugar Fix and press the brush (fanning it out) to the center of your nail. Then continue to slowly fan it out while pushing/painting back up to the top of your nail. When the brush fans out, it creates the cylinder effect we’re going for. Go back over the sides of the cylinder with your brush so the paint goes to the edge of your nail. Putting this step into words makes it seem a lot more complicated than it is. The brush is so great, it does all the work for you- trust me!
Step 3: Wait a couple of minutes for Sugar Fix to dry. Then take Tidal Wave and repeat step 2, except start halfway in the middle of Sugar Fix. The idea is to create these “Ruffian” layers so that you still see a little bit of the silver glitter and pastel blue underneath this final layer of royal blue.
Step 4: Wait another few minutes before sealing the deal with your Miracle Gel Top Coat! This locks everything in, putting the final gel hardening “stuff” on your design.
For more nail art tips and tricks, visit theGLITTERY.com and follow @theGLITTERYblog on Instagram!


How many colors of these do you have? They’re really hard to find, at least for me. I have 3 right now.
What a sweet mani! Totally reminds me on those Turkish eyes that protect you from bad ghosts lol! That SLly Hansen stuff sounds great!!! Xoxo, Sissi http://www.beauty4free2u.con